This article will explain how to remove a stocked unit from inventory in Blackpurl
How to Remove a Stocked Unit from Inventory
Scenario
The unit needs to be transferred to another dealership
Result required would be to have all the costs associated with the unit removed and that the unit no longer lists in the Dealership's unit inventory
To do this:
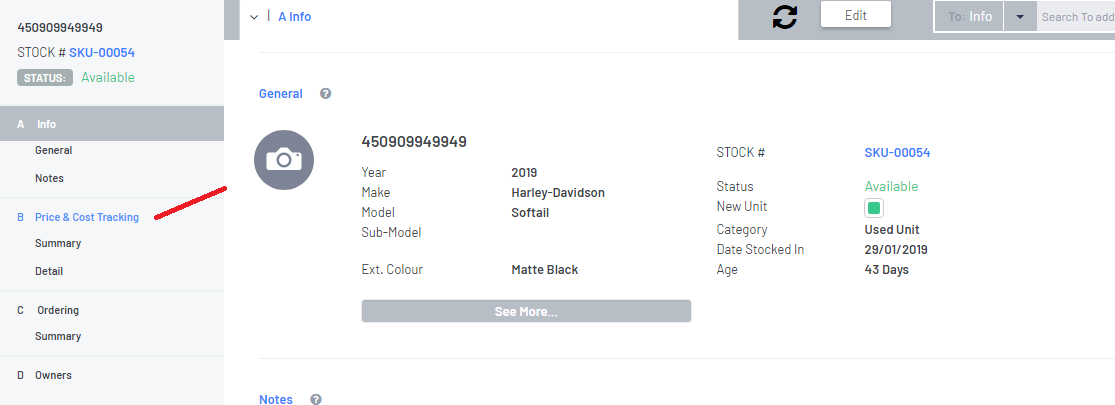
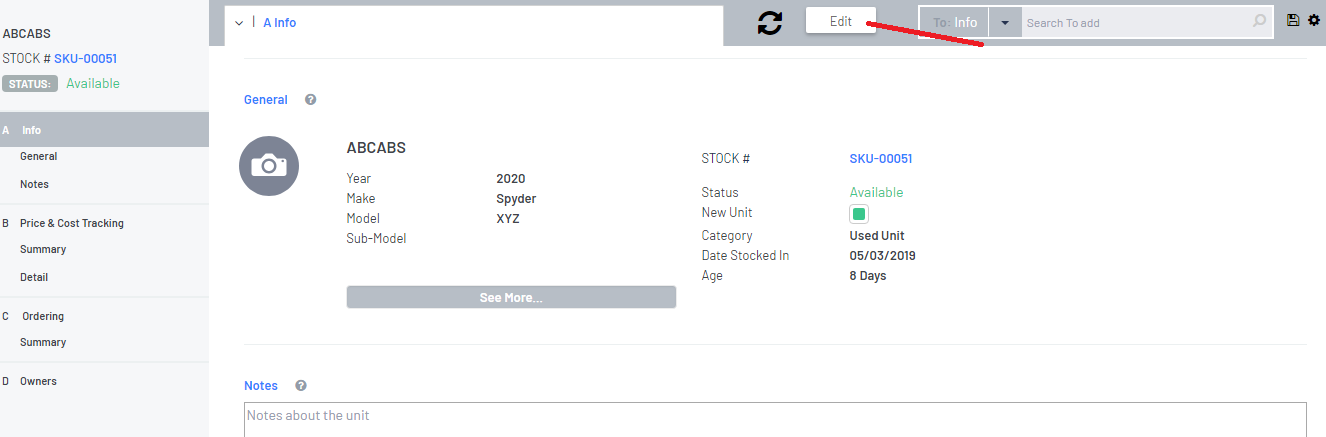
- Navigate to the relevant Unit Record and then once on the Unit Record scroll to Price & Cost Tracking
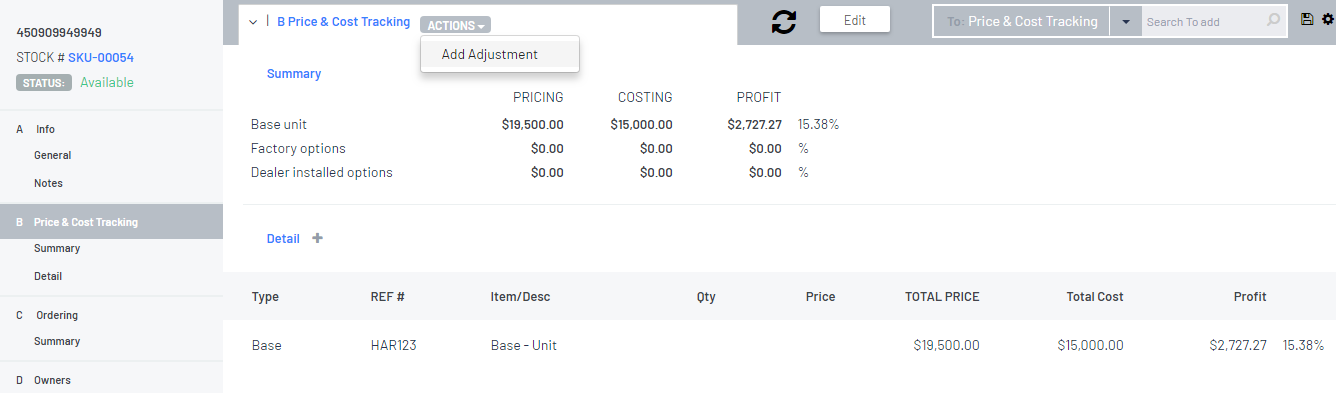
- First job is to remove all costs associated with the Unit by doing a Unit Adjustment
 then
then
- Then complete the fields on the Add Adjustment screen:
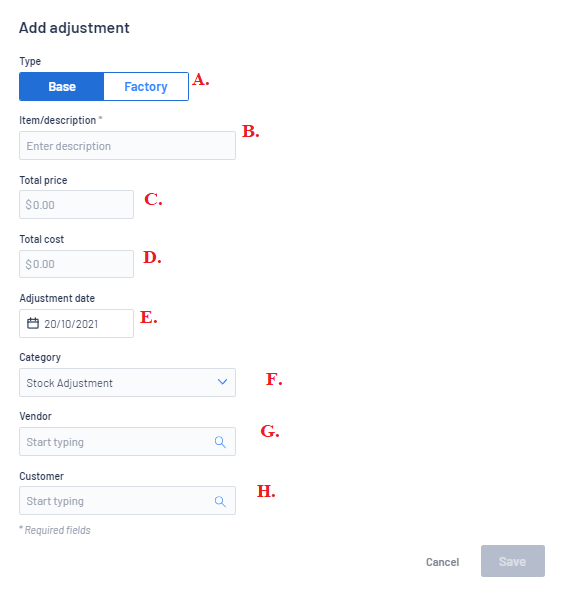
A. | Type | Leave as Base (there are other options but for this purpose leave as Base) |
B.
| Item/Description | Type in the name of the Adjustment – make sure it has meaning ie Unit Returned to Vendor |
C. | Total Price | On the Unit Record, it should show the Total Price the Dealership wanted to sell the unit for. To reverse this – type the amount in again but as a negative. This will not create any entry in accounting |
D. | Total Cost | On the Unit Record it should show how much the dealership was paying for the Unit. To reverse this – type the amount in again as a negative For our Australian dealers type the GST exclusive amount |
E. | Adjustment Date | Select what date you want to do the adjustment |
F. | Category | Select What category you want to involve – this only comes into play if you don’t select a Vendor in Field G. |
G. | Vendor | If you want the system to general an accounting document in your accounting package (for the Vendor which will sit in Accounts Payable), select the relevant Vendor and then you will be required to enter in a Vendor Invoice No.) This is recommended for Unit Transfers |
H. | Customer | If you want the system to general an accounting document in your accounting package (for the Customer which will sit in Accounts Receivable), select the relevant Vendor and then you will be required to enter in a Customer Invoice No.) This is not recommended for Unit Transfers – leave blank |

**If you entered in a Customer in Field H. then you will also be asked to add a Customer Reference Number and check the Applicable Tax (change if required0

Don't forget to 
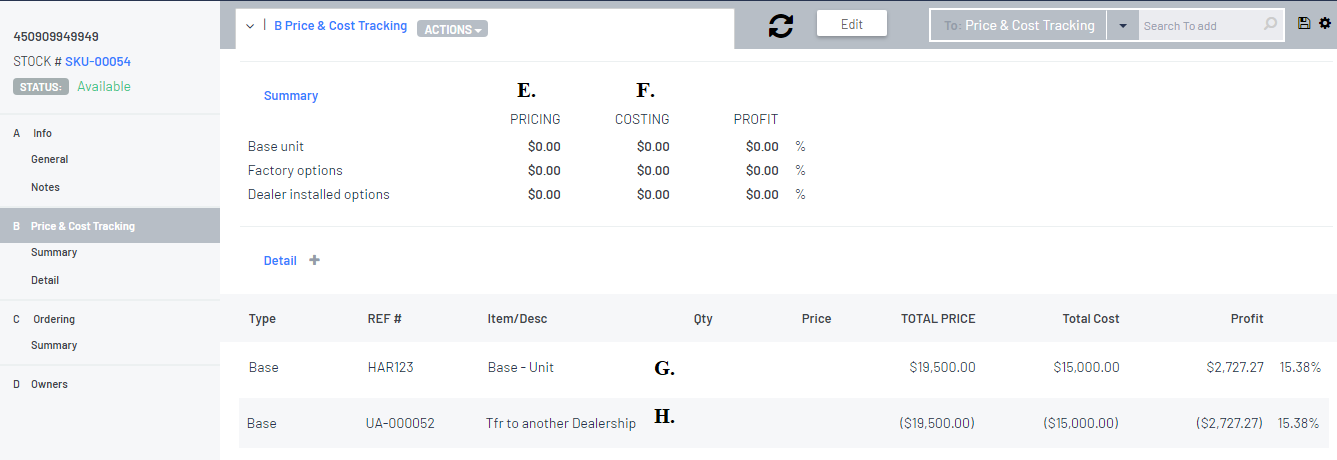
E. The Pricing should now be ZERO
F. The Cost should now be ZERO
G. This is the original entry of when the Unit was stocked
H. This is the adjustment entry that was just entered making column E and F ZERO
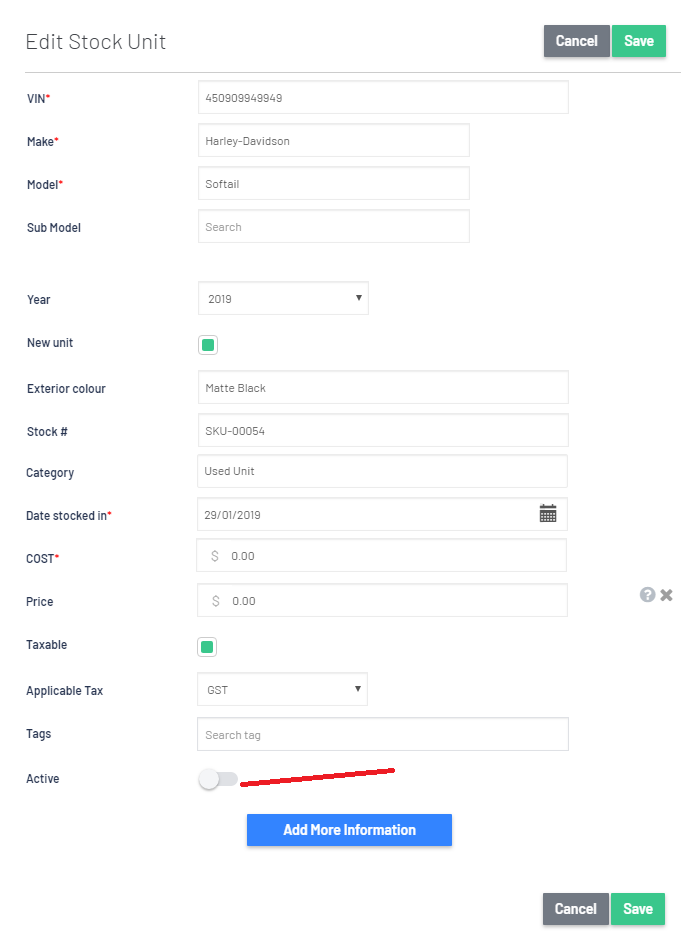
5. Now that the cost is zero, you will be able to make the Unit inactive

6. On the Edit Stock Unit screen > scroll down to the Active section and move the toggle to the inactive
position then click on  to finalise the change
Was this article helpful?
That’s Great!
Thank you for your feedback
Sorry! We couldn't be helpful
Thank you for your feedback
Feedback sent
We appreciate your effort and will try to fix the article