This article will go through what steps you need to complete if you are installing your Zebra Label Printer to a MacOS computer
Please note that if you are having issues with these steps, please reach out to your own IT person / company for them to assist you
Step 1 - Download the Zebra Printer Driver
Please download the latest Zebra Printer Driver from this website - https://www.peninsula-group.com/mac-thermal-printer-driver/download-thermal-driver.html
This is a third party application but it will give you the Printer Driver that is required
You may be required to enter in your Name and Email Address

Once you have downloaded the Printer Driver then follow the following instructions to install
- Double click on the downloaded dmg file, and the following screen will generate

- Drag the Thermal Utility to the Applications folder
- Double click on Open

- You will need to enter your computer username and password to install the drivers when asked

- Click on Click Here to Install your Printer Now

- Select USB connected printer from the dropdown menu and click Next

- Your Zebra printer should be automatically selected; if not, select it from the dropdown and click Next

- Select your printer model from the dropdown; if it’s not listed there, then select Other ZPL Zebra Printer > click Next

- Select the resolution based on your printer model then click OK

- Are you going to use a printing ribbon in your printer? > Click No

- Select Die cut standard labels on rolls and click Next

- Click on add other size label
Enter these parameters in the field and click on add to set the label size to 50 x 28 mm

- Your window should now look like this then click Next

- Keep all other settings default in the next coming modal window
- When encountering this window, all you need to do is drag and drop any pdf file having one page within the middle of the screen and then click Save

- Click on Install Printer

- Click OK to start the calibration of your Zebra printer

- After completion of installation > click Quit to close this window

- Your Zebra printer is now calibrated and is available for printing labels on MacOS
Step 2 - Installing Zebra Browser Print on MacOS
You will need to download the Zebra Browser Print to your MacOS by clicking on this link and filling out the relevant details - Zebra Browser Print Request
Once it has been downloaded
- Double-click to run the BrowserPrint-1.2.1.279.dmg installer and initial set up following the steps
- Drag the Zebra Browser Print installation into the Applications folder

- Click the Applications shortcut to open the applications folder and then double click the Browser Print Application

- When the program runs for the first time, the End User License Agreement will pop-up - select I Agree
- A pop-up about communicating with a web browser will appear and the certificate will be displayed in the web browser. Click OK

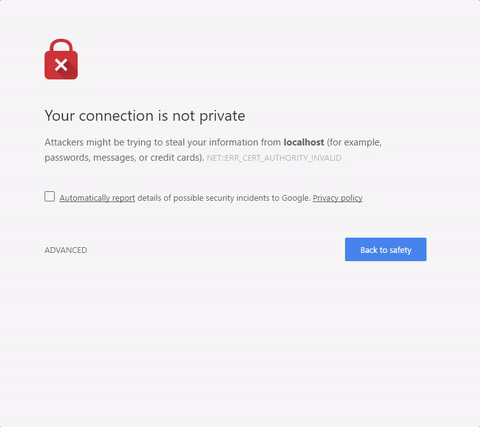
- From the new browser window, click Advanced, then click Proceed to localhost (unsafe)
- In a web browser, it displays the SSL Certificate has been accepted

- For the pop-up requesting access to any connected Zebra devices - select Yes
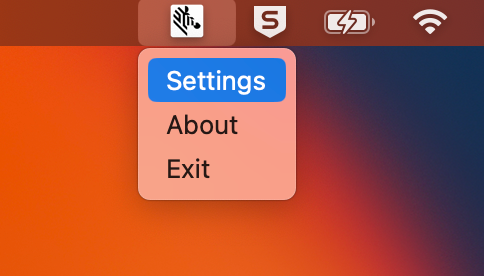
- A Zebra logo icon appears in the system tray indicating that the Zebra Browser Print is running on your PC
Step 3 - Running Browser Print
- Click on the Zebra log icon and select Settings
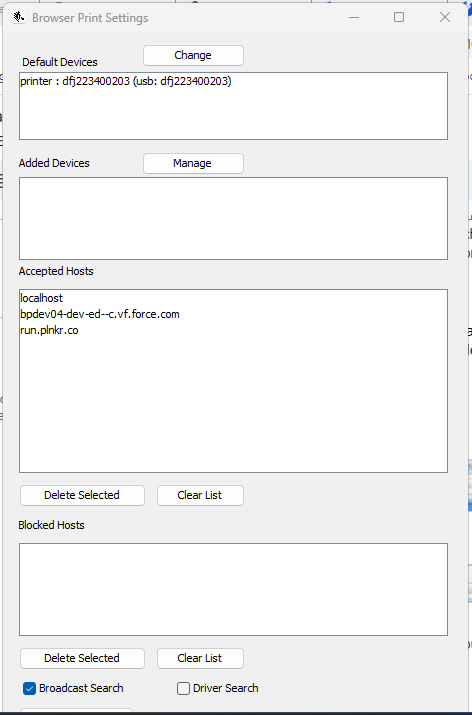
- To set or change the default printer, click the Change button. A pop-up will appear with a dropdown of all discoverable devices
- Select your Zebra Printer from the dropdown menu and click Set
Was this article helpful?
That’s Great!
Thank you for your feedback
Sorry! We couldn't be helpful
Thank you for your feedback
Feedback sent
We appreciate your effort and will try to fix the article