This article will cover how to complete a Part Stock Adjustment in Blackpurl
Please keep in mind that if you have Accounting Integration, both an increase and decrease in Stock on Hand will result in a transaction posting in your Accounting package
Scenario:
- Dealership finds parts at the back of the Dealership and want to write it into stock on the relevant part record so that Blackpurl shows the correct quantity in stock
- Dealership notices that a part has been stolen from the front counter and the dealership wants Blackpurl to record that it has been stolen so that the correct quantity is shown in Blackpurl
How to complete a Part Stock Adjustment
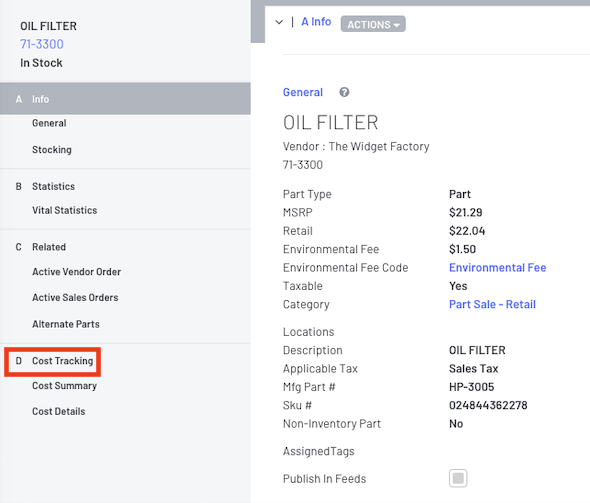
- Navigate to the relevant Part Record > click on Cost Tracking and it will take you to this section
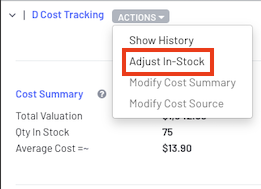
- Click on
 to list the options available and select the option Adjust In-Stock
- From the Adjust In Stock Quantity window, you can start processing your Parts Stock Adjustment
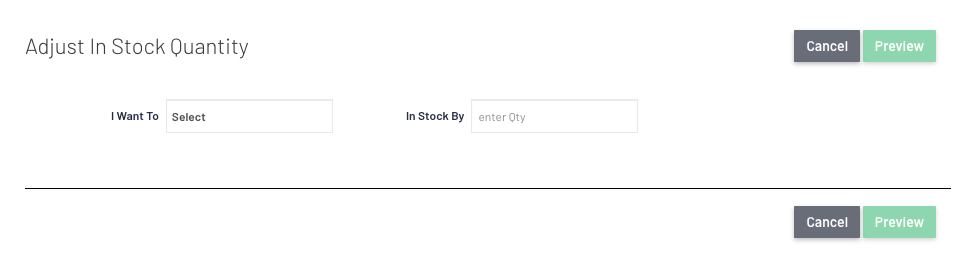
- Click on
 to view your options.
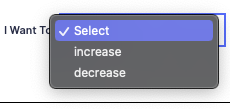
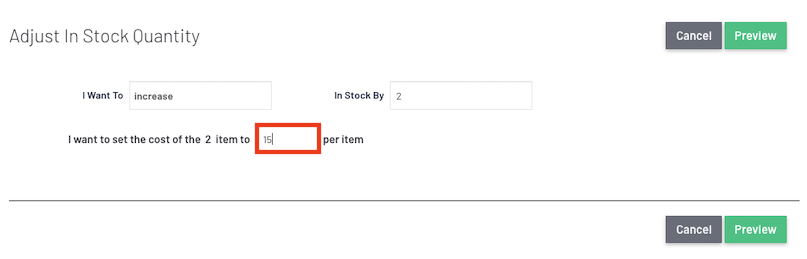
Option 1 - If you select Increase
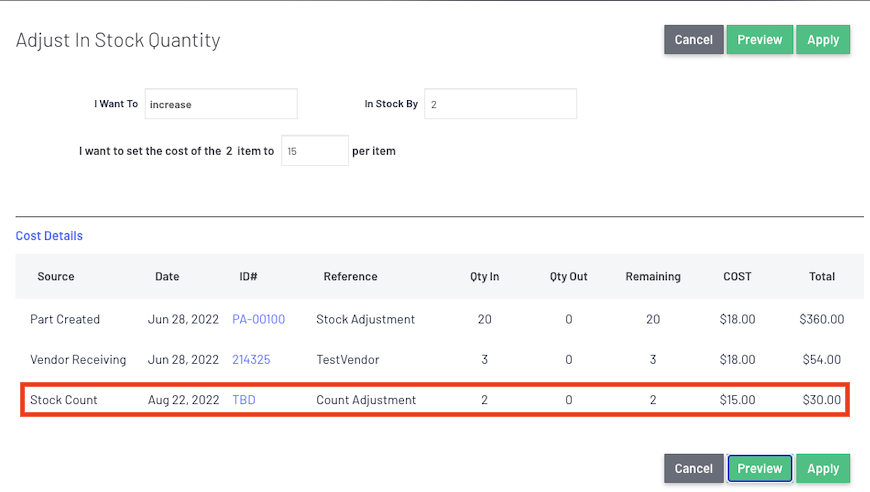
 The preview will allow you to see the Parts Stock Adjustment before the change is applied.
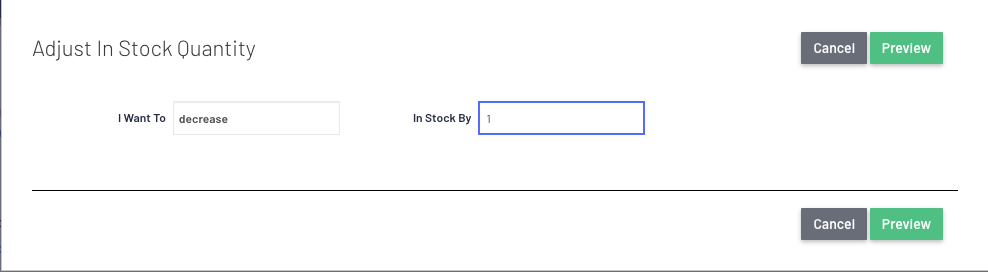
Option 2 - If you select Decrease
If you want to Decrease the Stock on Hand > click on Decrease and then tab to the next field - In Stock By field > type in the quantity you want to decrease the Stock on Hand by
In our example below we want to decrease our Stock on Hand by 1
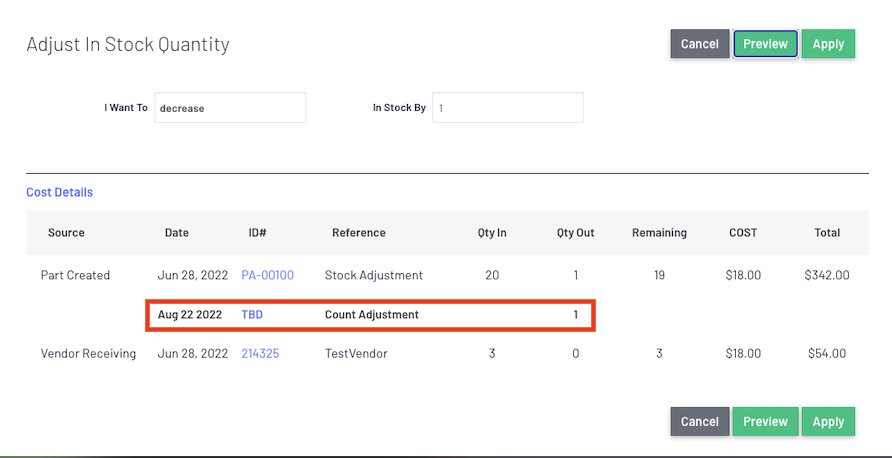
 to see the Parts Stock Adjustment before you apply the change
- The Stock Adjustment has been completed
Was this article helpful?
That’s Great!
Thank you for your feedback
Sorry! We couldn't be helpful
Thank you for your feedback
Feedback sent
We appreciate your effort and will try to fix the article