This article will show how to process a Service Job
How to Process a Service Job
Scenario: An existing Customer - Jaxon Price - requires a service and new brake pad to be installed on his unit
- From the Blackpurl Header > click

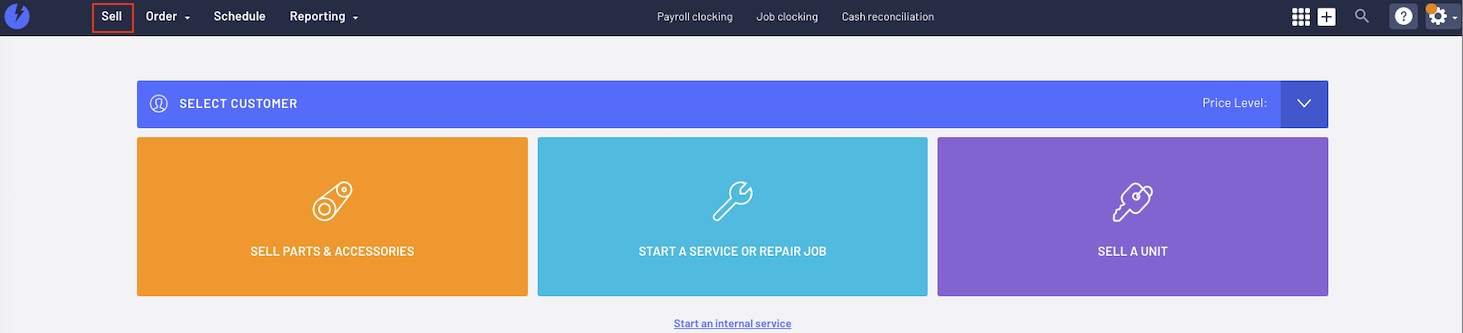
- Click on the Select Customer section and then Select for an existing customer field
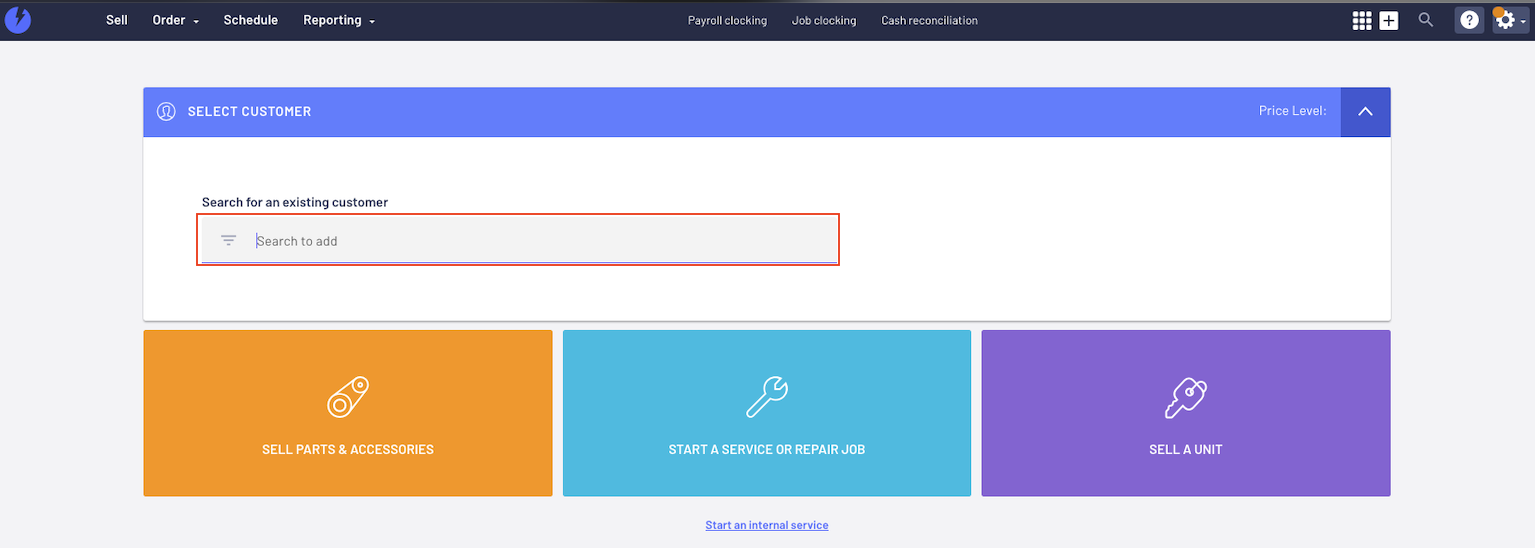
The Select for an existing customer functionality will allow you to search for the customer using keywords such as surname / first name / mobile number/email address
As you start typing your search keyword, the system will start listing the search results that match. In our example, we search for our customer Kristelle Dubois using his surname - Dubois - as the keyword
Once you see the required customer, click to select
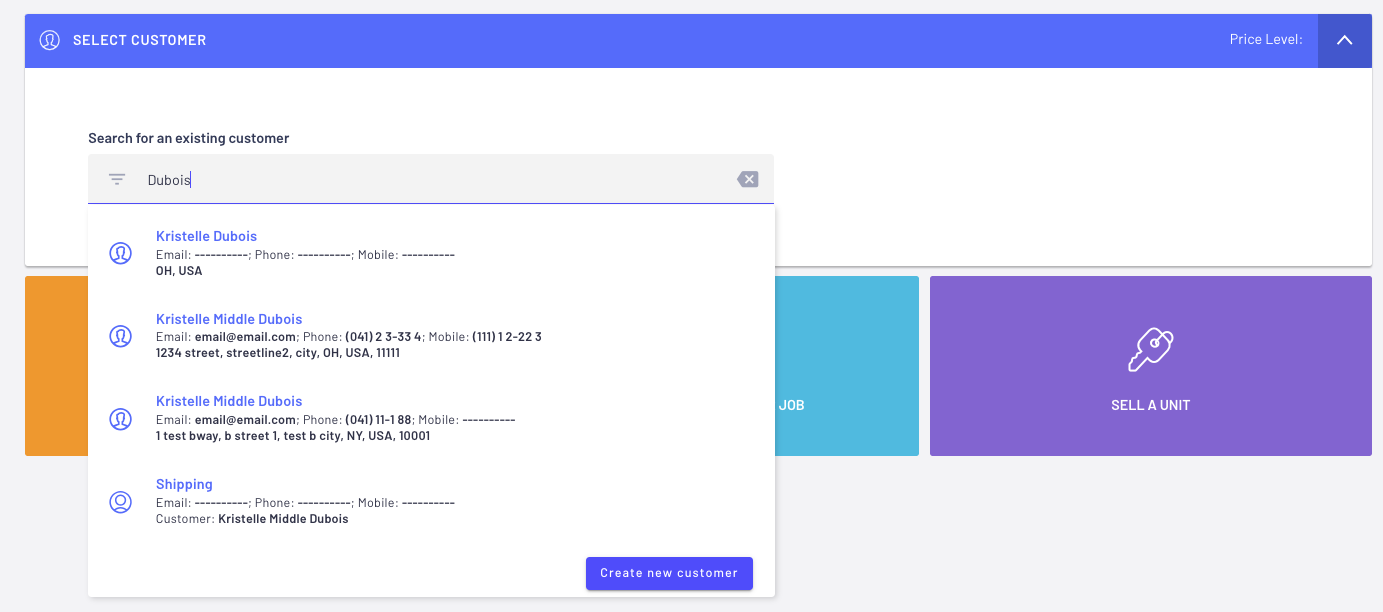
 for the Create New Customer window to pop up for completion.
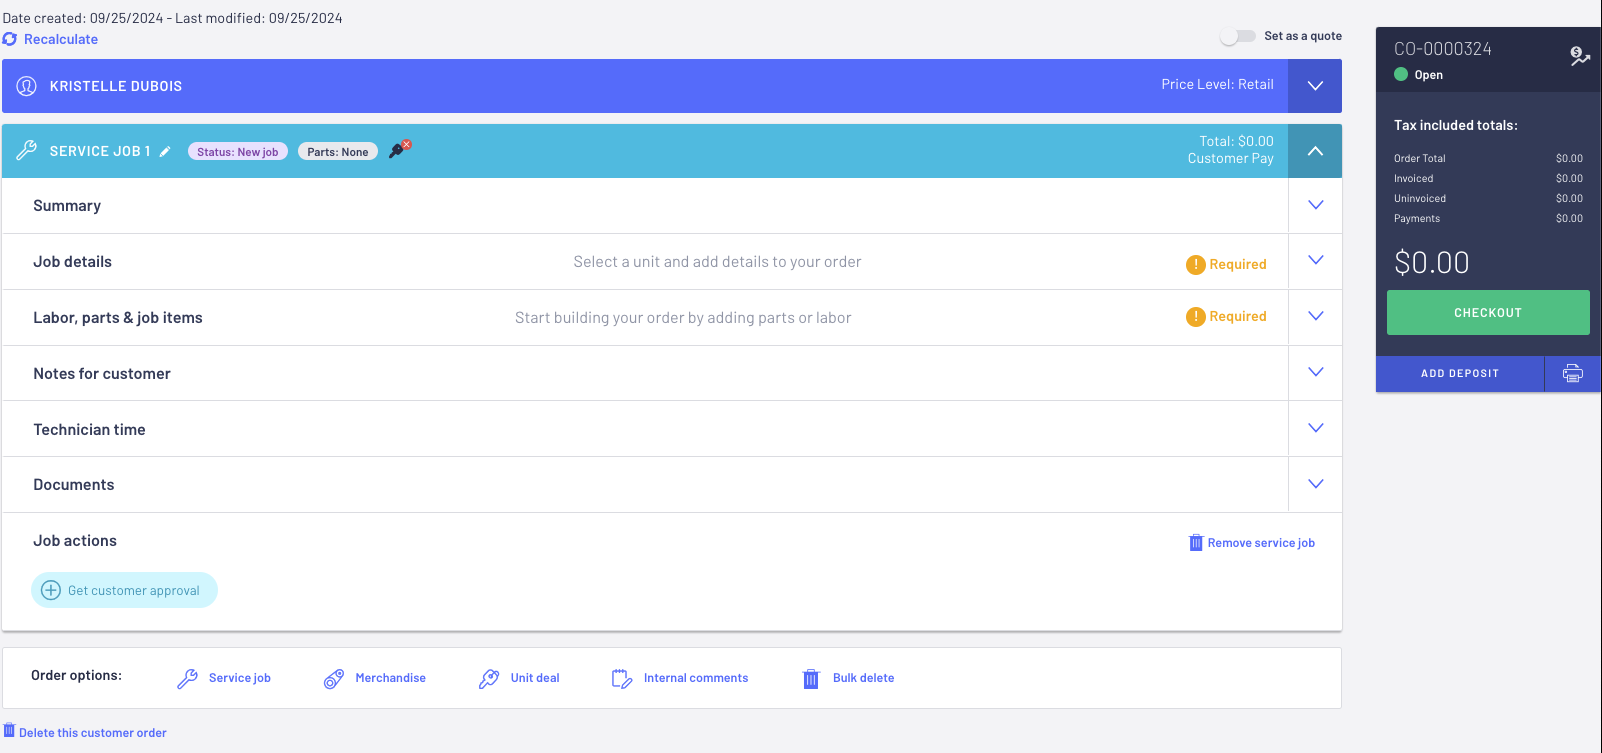
- After selecting your customer, select START A SERVICE OR REPAIR JOB

The system will automatically open a Service Job 1 section with the status of New Job
- Using the drop down arrow
 open up the Service Job 1 > Job Details section and add / complete the relevant information

User will need to select the relevant Customer Owned Unit or click on 

B. Who is paying for the job? - User will need to select the correction option, such as:
- Customer Pay - the customer is paying for the Service Job themselves
- Third-Party Pay - a third party such as Insurance or warranty claims, is paying for the Service Job
- Internal Expense - the dealership is wearing the cost of the Service Job
- Quote - at this stage, the Service Job is only a quote
C. Concern - the user can type in what concerns the customer has, etc
For example: 12000km service required
After the user has typed in the Concern, remember to press Enter to accept the text into that field
D. Cause - if there are any specific causes for the concern
For example: The customer may have mentioned that they ran up the gutter
After you have typed in your Cause, press Enter to accept the text into that field
E. Correction - what corrections may be required or what corrections have been completed
After you have typed in the Correction, press Enter to accept the text into that field
F. Odometer readings - what is the odometer reading upon arrival at the dealership and upon departure?
- Using the drop-down arrow
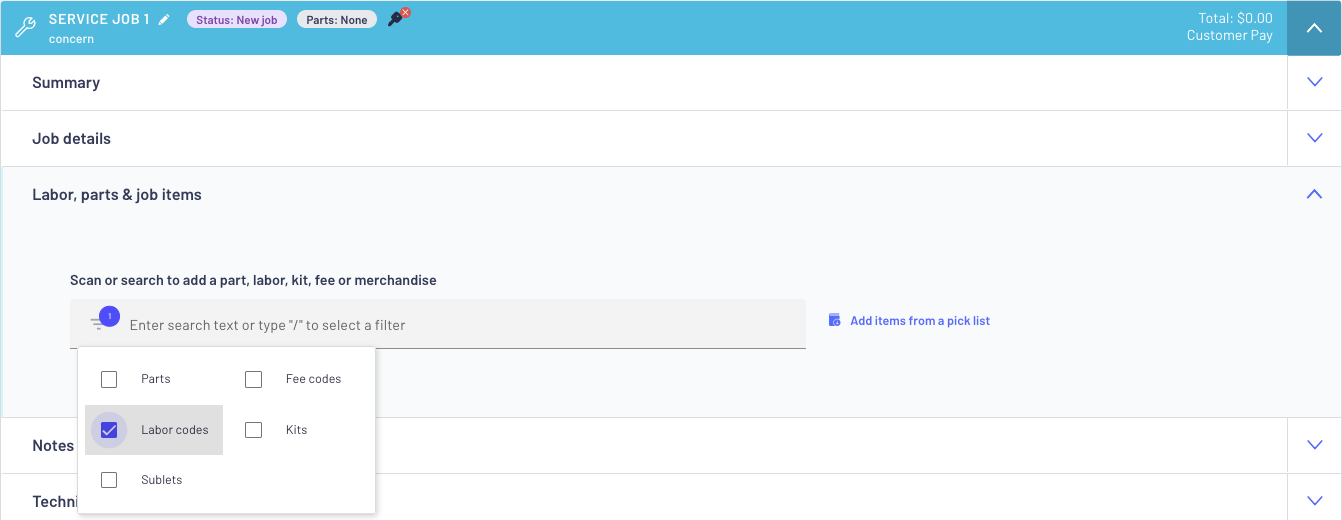
 open up the Service Job 1 > Job details section and add what parts/labour/fees etc required for this service

To search, select keywords such as Labor / Parts / Sublet / Kit / Fee codes. If you use a keyword it narrows down the search result
For example - we are required to add a Labor line for this Service Job. Select the Labor as your keyword
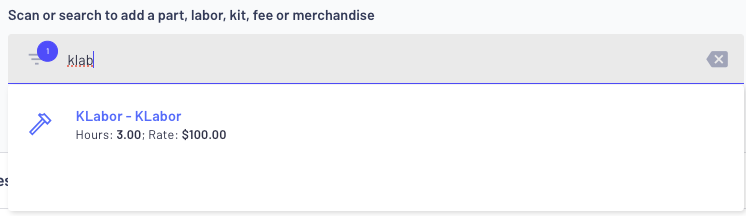

- Using the same concept in Step 5 - search for Brake Pads use the keyword Parts:

This would also be a good time to obtain Customer Approval for the work you are about to do on the Customer's unit.
Please review the follow article that will take you through the Customer Approval options - Service Jobs - Approval from Customer using Verbal / Printed or Digital Signature
7. If the Service Job is ready to be worked on and the unit has been received > change the status
(as required) from the Service Job 1 header to READY TO START

 > select the option to print the Service Worksheet.
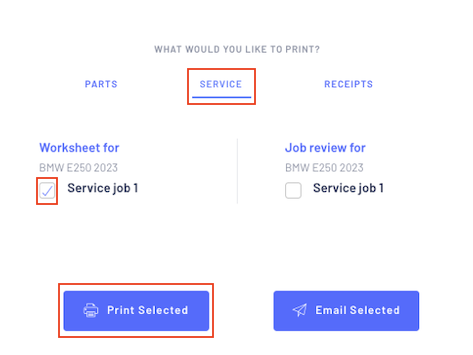
- Once the Service Worksheet is returned by the technicians, start to finalise the Service Job

- Type in any Notes for customer
- Update the Odometer reading
- Update any changes to the Labour Qty etc
- Do you need to manually add technician time, click on Log Technician Time, and complete
- Add any attachments under the Documents section
Please note the size limit of each image is restricted to 1.25MB. Users can upload larger images but please be aware that they will be compressed to still fix the 1.25MB limit
We are aware that the user can upload around 50 images
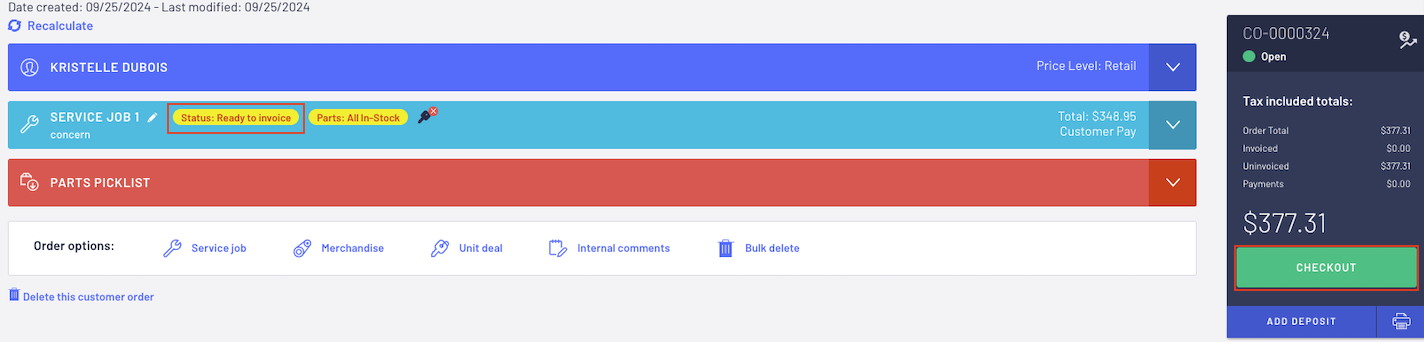
- Once the status of the Service Job has been changed to Ready to Invoice, the job is now ready for Checkout.

If the Dealership wishes to introduce new Service Job Statuses, this article will assist - Service Job Statuses - Selecting and then Using / Ready to Invoice Enforcement
- In the Select what you want to Checkout section, it will indicate any items ie Service Job 1 that is available for checkout

- You can process multiple Payment Methods > just choose your Payment Method and type in the amount payable by that payment method / then choose another Payment Method for the next payment until full amount of the Customer Order is complete
- If there are multiple items for Checkout, the user can choose which items are being checked out
- You can backdate your payment or invoice. Please see our article - How to Backdate Customer Order Deposits / Payments / Invoices

- Once the Customer Order is finalised, no further changes can be made as the status is now CLOSED and a new Invoice History section has been added
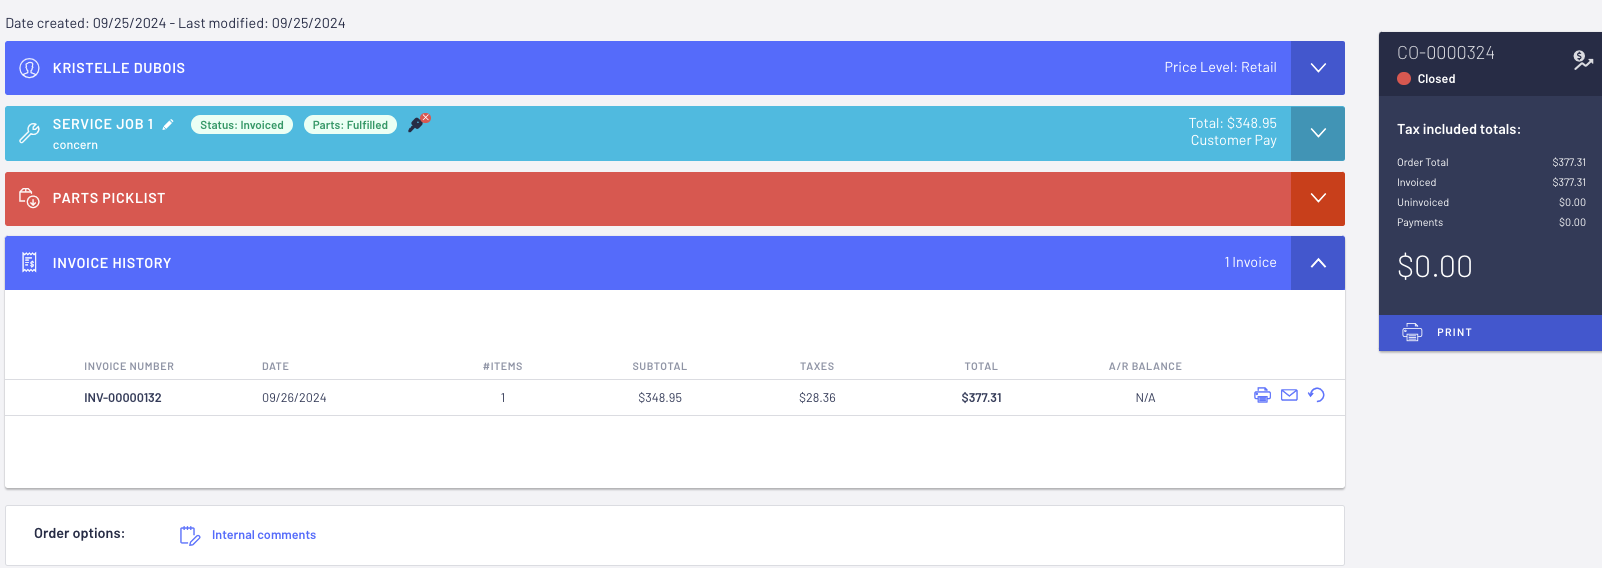
- Result:
- The Customer Order will now be listed on the Customer Record under Service History

- It will also be listed on the Customer Owned Unit Service History

Was this article helpful?
That’s Great!
Thank you for your feedback
Sorry! We couldn't be helpful
Thank you for your feedback
Feedback sent
We appreciate your effort and will try to fix the article