The above video and this article will explain the options on a Service Job of "Who is paying for the job?"
'Who is paying for the job?'
There are 5 default options that are automatically available when your Blackpurl is created:
- Customer Pay
- Third-Party
- Internal Expense
- Quote Customer
- Quote Third-Party
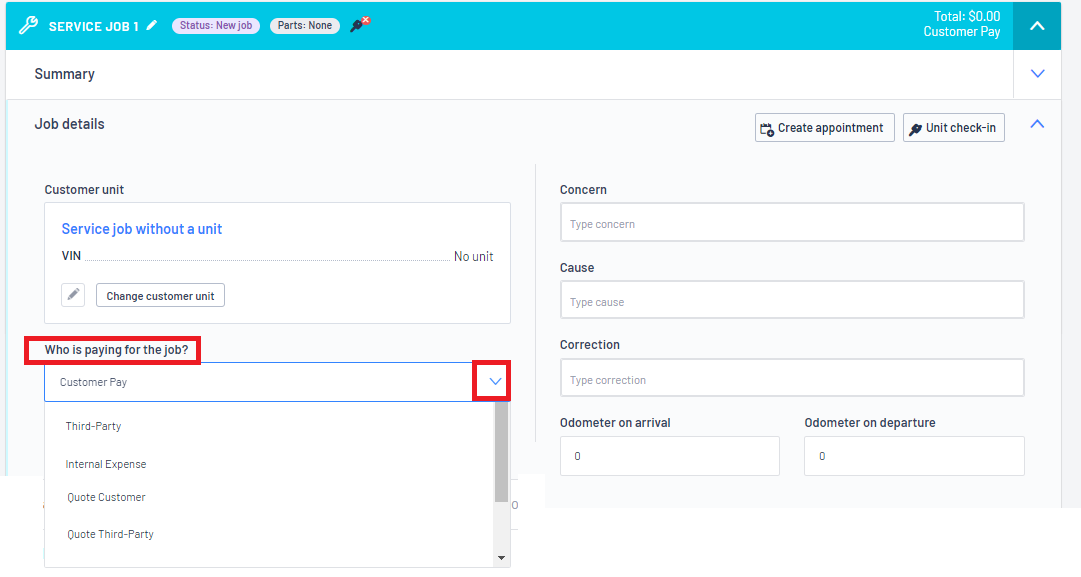
Let us go through the default options:
Customer Pay
- When creating a new Service Job, this is the default. That is because for the most part - the Customer will be paying for the work that is getting done to their own Customer Owned Unit
- With this option - you will need to complete and finalize the Service Job and then use Checkout when the Customer pays
- For further information please review our article - How to Process a Service Job or the relevant video - Video - Customer Order > Service Job - Customer Pay
Third-Party
- Use Third Party when you have a Third Party paying for the Service Job ie Insurance Claim or Warranty Claim etc
For further information, please review our video - Video - Customer Order > Service Job - Third Party
- With this option - you will be required to indicate who the Third Party Provider is, if any Deductible or Excess is payable by the Customer and go through the submitting of Claim
Tip:
If the deductible is taxable in your location, please see this article on how to set up tax on deductible - Additional Information - Third Party Service Jobs (ie Warranty Jobs or Insurance Claims - Deductible are taxable etc)
- For the relevant Vendor to turn up for selection as the Third Party Provider, you will need to indicate on their Vendor Record that they are able to do Claims for Service Work
This is the link to the article which will explain how to do this - How to Setup Vendor Products and Services
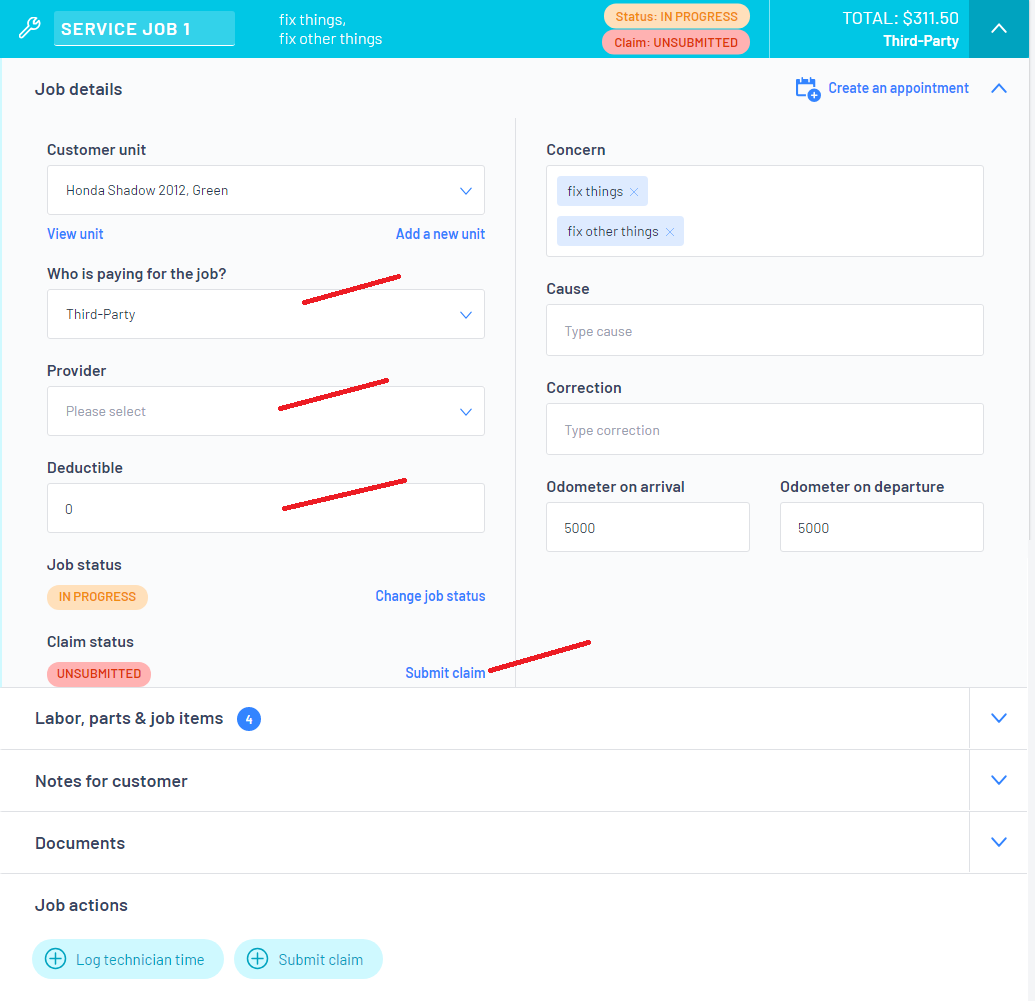
- Once you are ready to submit the claim to the Third Party Payer - click on Submit Claim > you will need to Verify Claim Information by reviewing the information (to make sure it is correct)
- Then check the I have reviewed the above information checkbox and click on

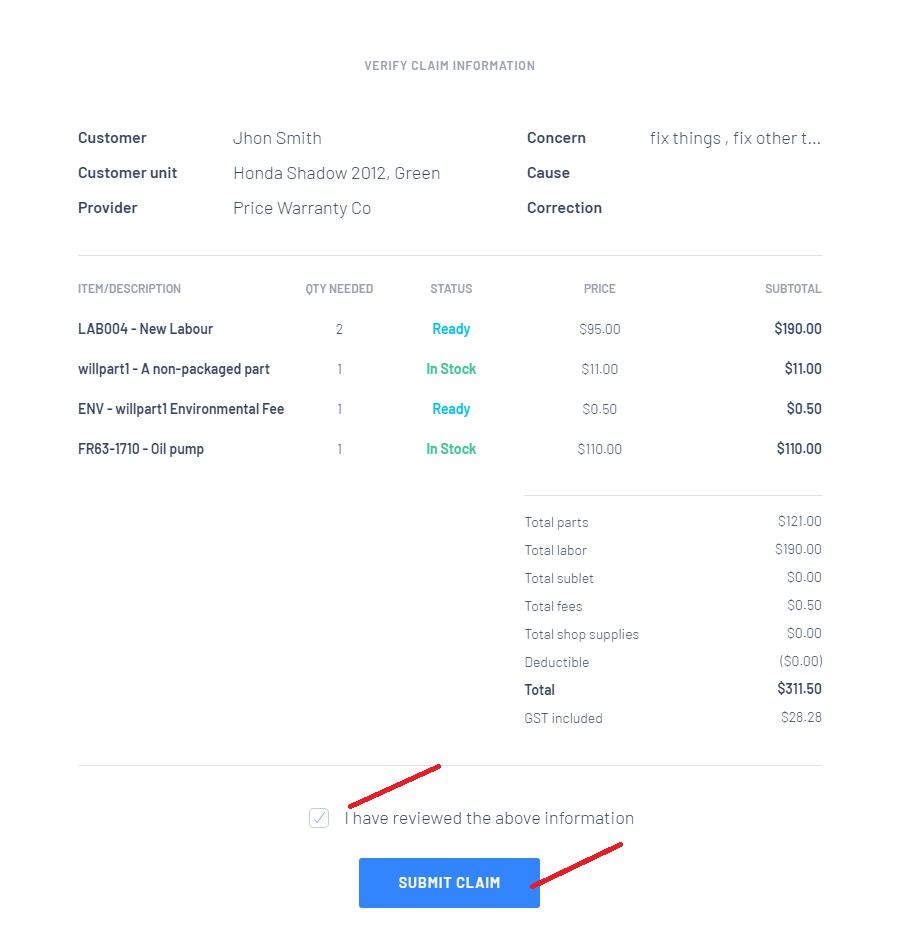
- The status of the claim will change to Submitted
 and the Dealership would then need to manually send off your Claim to the Third Party
- Once you have a response from the Third Party Payer > Click

- The Claim Response is a 3 step process - Claim Response / Claim Disposition / Finalise Claim
- Complete the Response Information details than click on

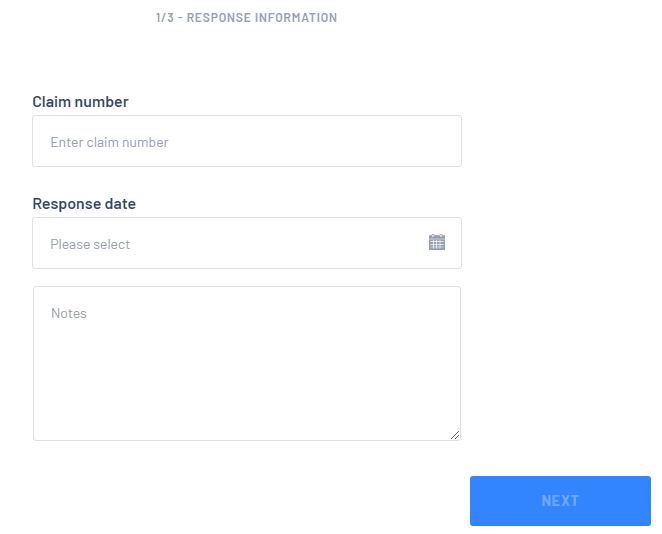
- On the Response Detail record there are three Claim dispositions - Accepted / Accepted with Adjustments / Denied:
- There is no variances and Third Party payer has indicated that they will pay what has been submitted to them
- Just check the totals and click on

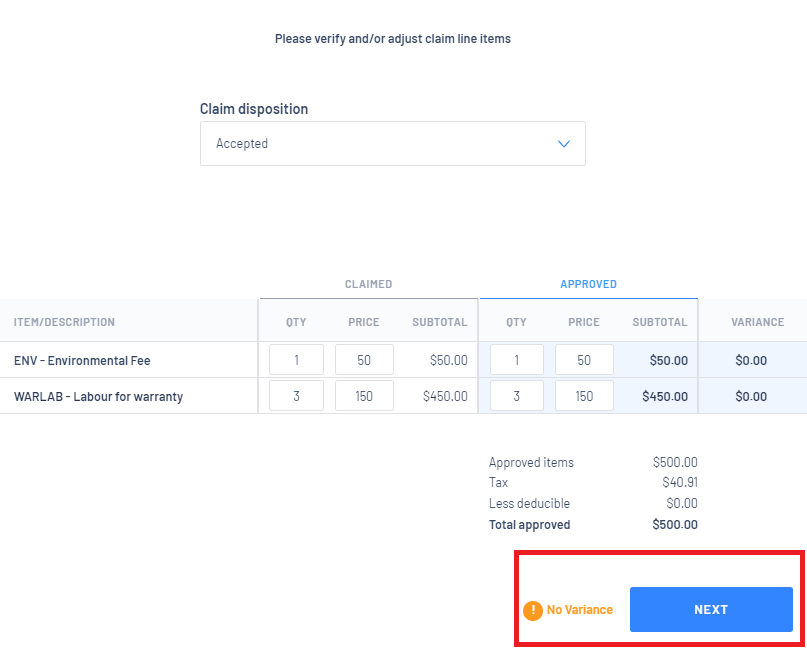
- As there is no Variance, click

- This will finalise the Claim and issue out a Third Party Invoice

- This is when the Third Party payer will pay on your claim but they will not pay on the full amount
- The user would alter the line items to be what has been approved
- The Claim disposition will change automatically to Accepted with adjustments
In our example below - we have changed the price on both line items as our Third Party payer has indicated that they are paying the claim but at a reduced rate
Then click on 

- With the variance, you can record what category you want the variation to go to

- Then click on

- This will finalize the Claim and issue out a Third Party Invoice
- The Third Party Payer is not paying any of the claims
- Once you change the Claim disposition to Denied, all the figures will zero out and a variance is noted
- Click on


- The variance will automatically get billed to the customer
- Then click on


Once you have completed the Claim Response - to finalise the Service Job click on 

This will generate an invoice in the name of the Third Party Provider
- The Invoice to the Third Party will integrate with your accounting package as an Accounts Receivable transaction and the invoice will sit as unpaid in your accounting package under the Third Party name
- You will be unable to receive a Payment from a Third Party through Blackpurl - the invoice is sent to your accounting package as unpaid and any payments will need to be received there
For further information on Third Party Service Jobs, please review this article - Additional Information - Third Party Service Jobs (ie Warranty Jobs or Insurance Claims)
Internal Expense
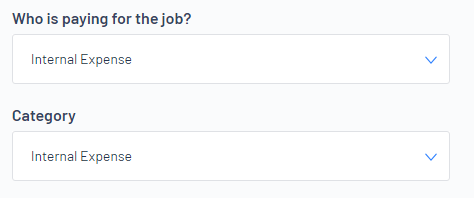
- Use Internal Expense when it is necessary for the dealership to "write off" a Service Job or maybe it is a goodwill gesture / maybe the dealership had rework issues etc
For further information, please review our video - Video - Customer Order > Service Job - Internal Expense
- When selecting Internal Expense, a Category must also be reviewed and changed as required
For our Dealerships that have Accounting Integration, this is where this Service Job would be "written off" to in your accounting package
- Service Job will still need to be finalised as normal by clicking on
 .
.
- This will then populate the Finalize Internal Job window for you to confirm.
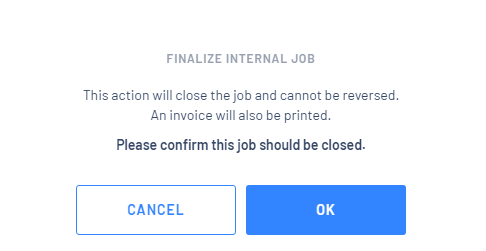
- Once confirmed - an invoice is created and no further action is required
Quote Customer
- This will allow the Dealership to build a quotation to the Customer without committing inventory or special ordering parts
- You would just build the Service Job as normal with this Transaction Type
- If the Customer wishes to go ahead with the quotation, you would change the Transaction Type to Customer Pay
Quote Third-Party
- This will allow the Dealership to build a quotation for a Third Party ie warranty or insurance company without committing inventory or special ordering parts
- You would just build the Service Job as normal with this Transaction Type and then change it from this Transaction Type to Third Party once you have received notification from the Third Party that this Service Job will be going ahead
If you require new options of "Who is paying for the Service Job", you will need to add additional Service Job Transaction Types. Please review this article - Step 8 - Understanding Accounting Integration - Transaction Type
Was this article helpful?
That’s Great!
Thank you for your feedback
Sorry! We couldn't be helpful
Thank you for your feedback
Feedback sent
We appreciate your effort and will try to fix the article