This article / video will go through the following topics of Scheduler:
- Appointment Scheduler
- Assigning Technicians in Scheduler
- Assigning Technician and Job Clocking direct from the Customer Order > Service Job
- Editing an Appointment
- Deleting an Appointment
- Log Technician Leave Time
Prerequisite
- The Dealership's Default Working Hours have been set up in the Account Settings > Settings & Controls - Shop Settings
Please review our article - Setting up Default Working Hours for the Dealership
- Each relevant Technicians has been set up for Payroll Clocking and Job Clocking and their default workdays have been set in Account Settings > Users - Time Clocking Staff
Video - Scheduler
Article - Scheduler
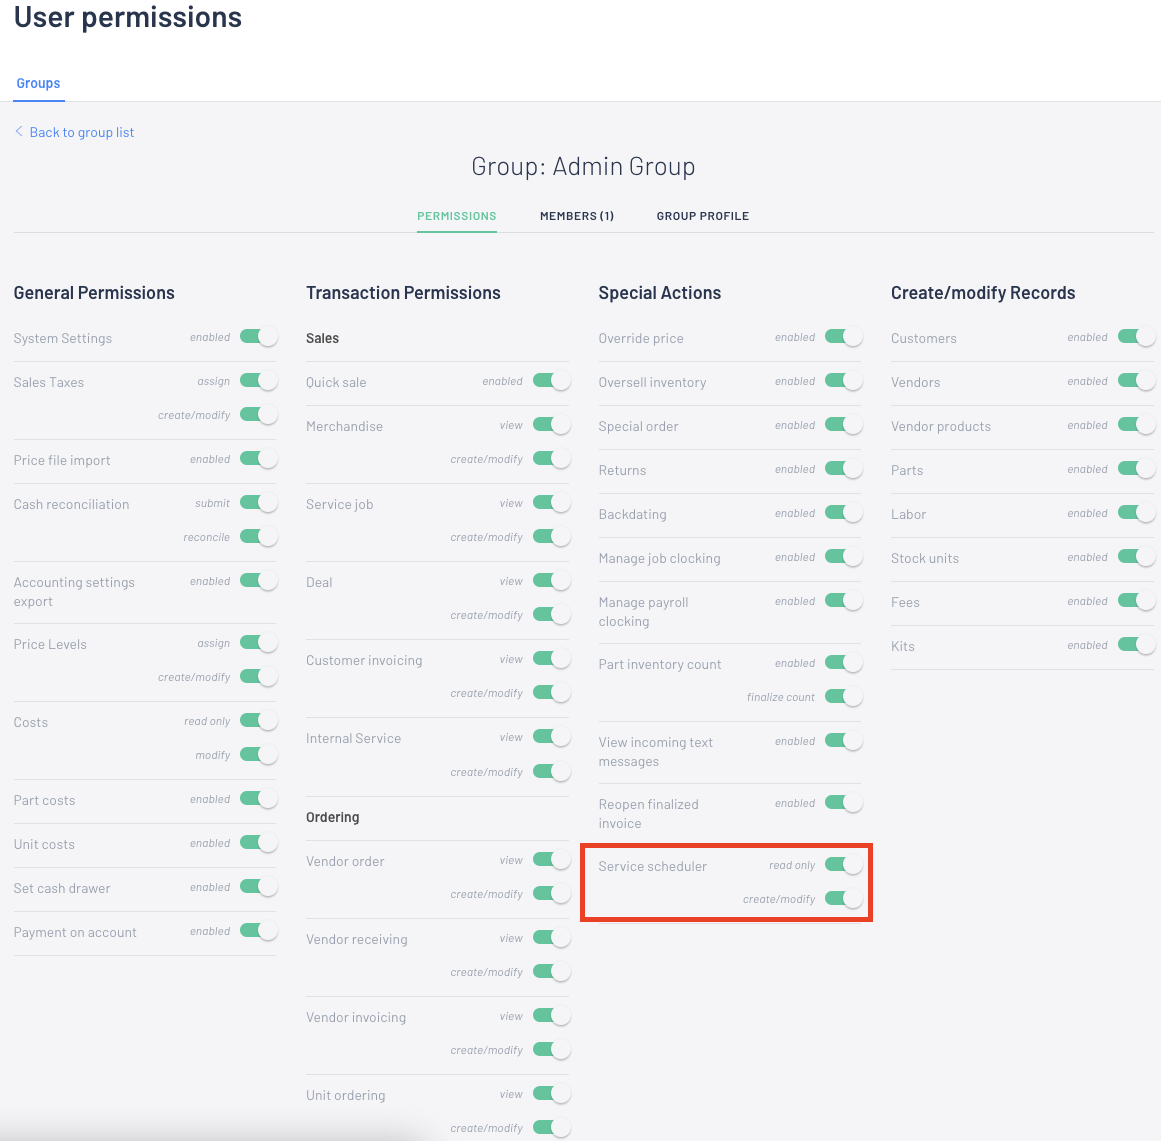
- From the Blackpurl Header > click on

- Let's break the Scheduler screen down for you:
- Day View
- Week View
- Month View
3 Appointments can be created by clicking on New Appointment
4 This is the date range for your appointments. Using the toggle you can scroll to the other date ranges
5 This will indicate how many hours have already been booked and how many hours are still available
The system calculates the total time by how many techs you have and how many hours they work that day
For example, if you have two techs that work 8 hours each, there are 16 hours available to be booked for that day
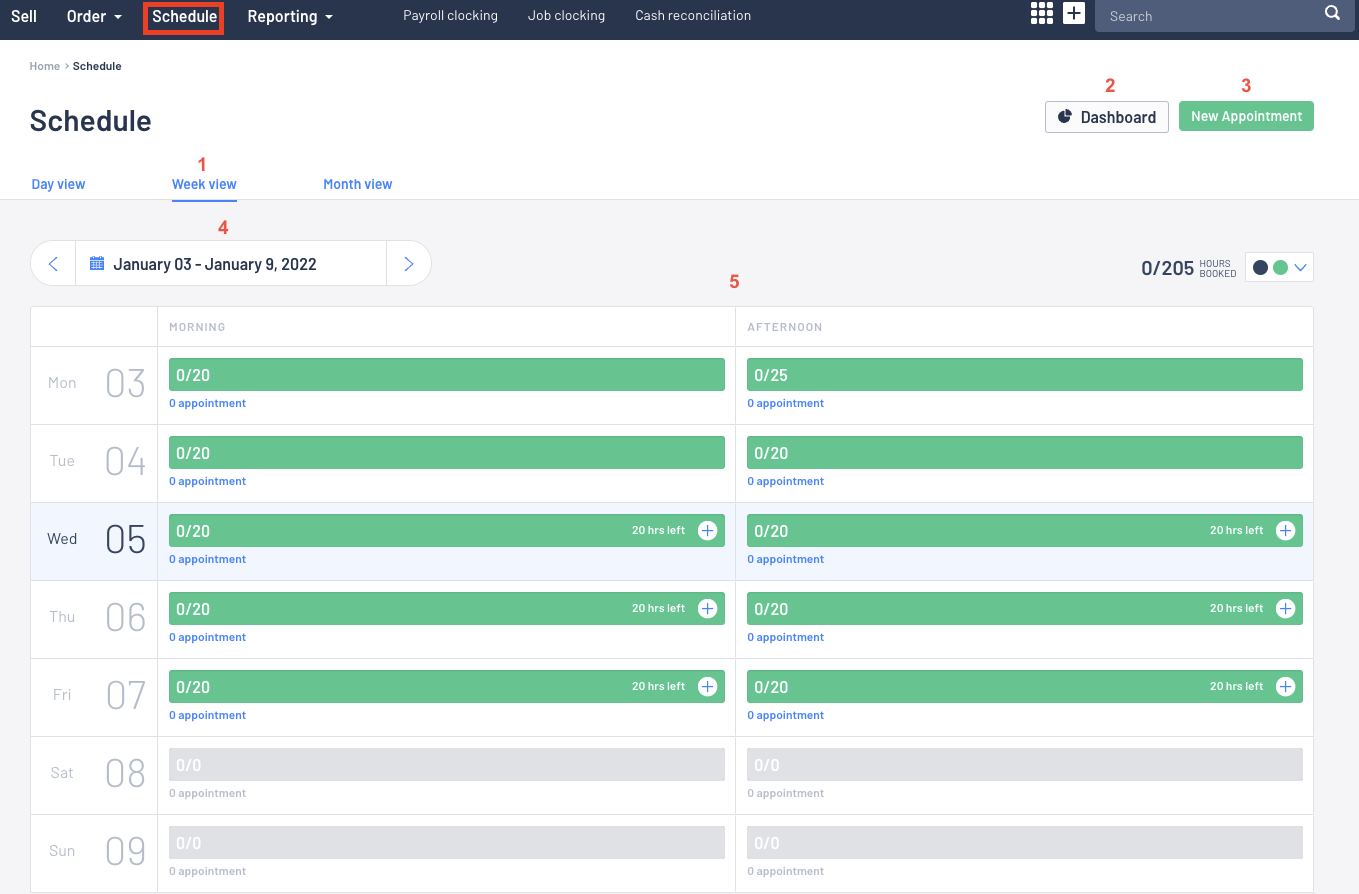
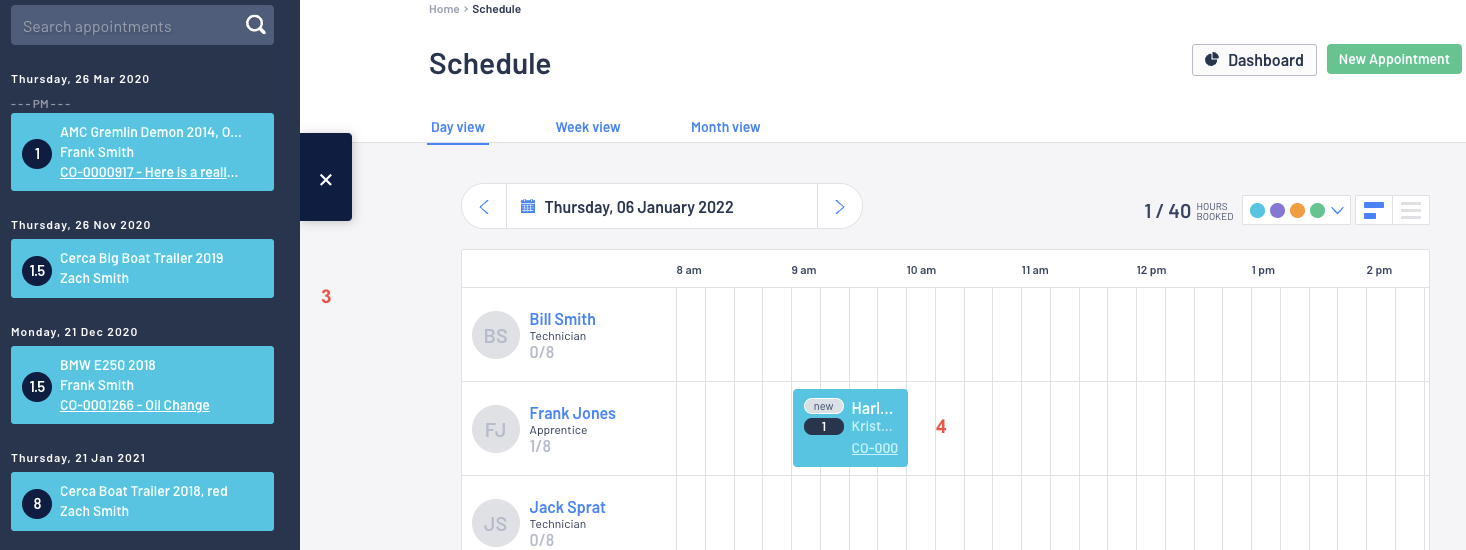
- In our example, we are going to book in / make an appointment for 1.5 hours to do a 10,000km service on Kristelle Dubois' BMW on the 7th January 2022
A full safety check will also need to be completed
- At the top of the screen - click

The appointment screen will pop up for you to complete
If you create a new appointment this way, you will also need to indicate the time/date
OR
- Navigating to the date and either morning or afternoon you want and then clicking on the

If you create a new appointment this way, the date and morning/afternoon time will auto-populate
| 1 | The date and time from (morning or afternoon) for the appointment |
| 2 | If there is already an existing Service Job, you can link this appointment to it by searching for the relevant Service Job and selecting it |
| 3 | In the Untitled appointment section - it will allow you to give the appointment a name |
| 4 | You can search for the Customer Name (or create a new customer) - once you have selected the customer, the system will ask you to select what unit the appointment is for |
| 5 | Type in the Concern including any notes from the customer ie what the customer may want the technician to check etc |
| 6 | Who is paying - Customer Pay / Third Party / Internal |
| 7 | Estimate Hours - how many hours you think it is going to take This estimated hour is needed for the scheduler to know how much time to set aside for this appointment |
| 8 | If the appointment is going over multiple days, move the toggle to indicate Make multi-day |
| 9 | When the unit is due to arrive - date / time When the unit is due for departure - date / time Has the unit actually arrive? |
| 10 | You can assign a Technician at this time (if required) For multi-day appointments you will be required to assign a Technician You can also schedule multiple Technicians onto the same appointment and you can also assign a single technician multiple times on a single appointment |

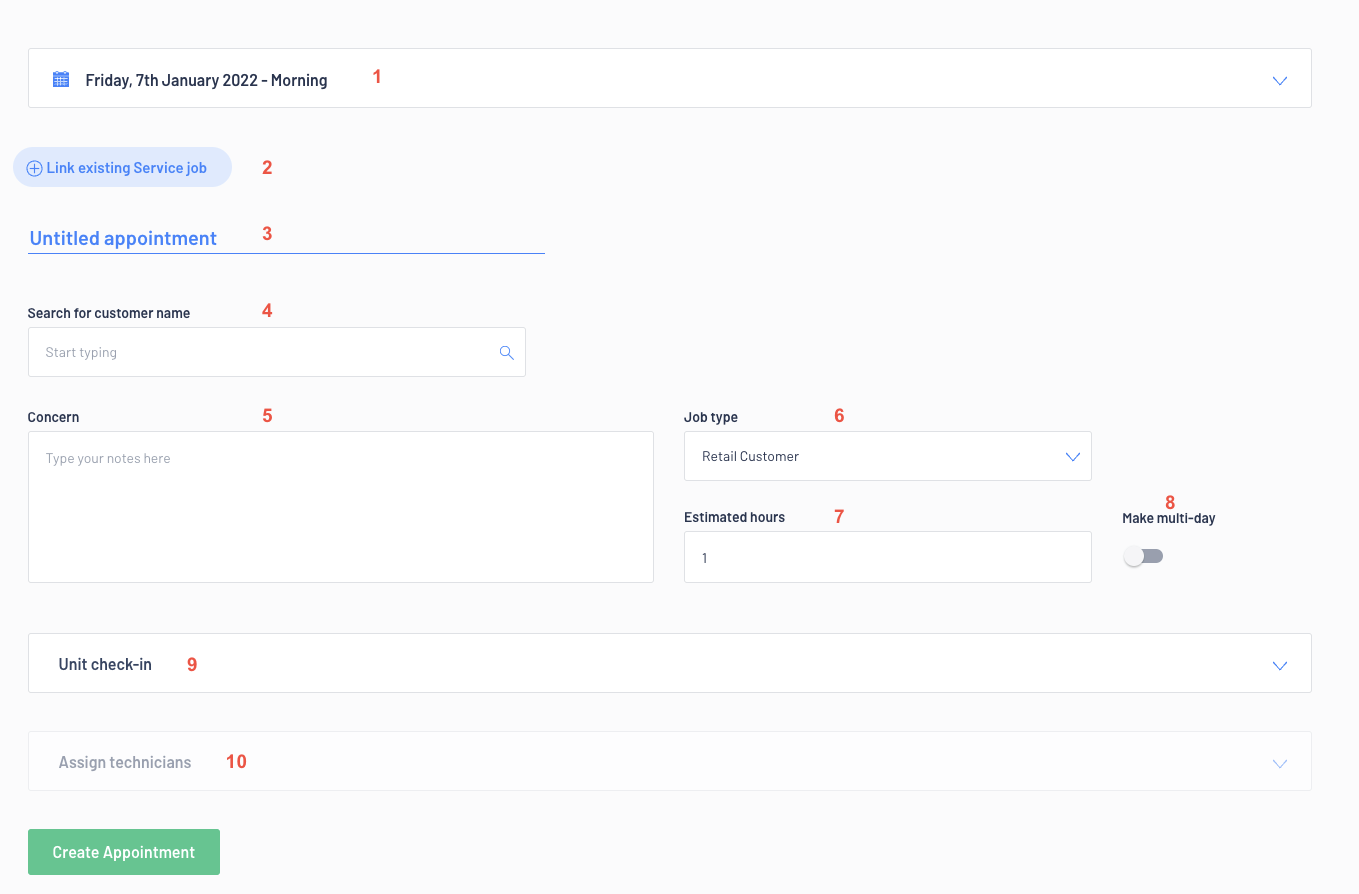
- The Scheduler for the 7th January 2022 in the morning has now changed and our estimated time of a 1.5-hour appointment has now been taken into consideration
Assigning Technicians in Scheduler
- When you were creating the appointments, the dealership had the option of assigning a technician
 to open the unassigned section
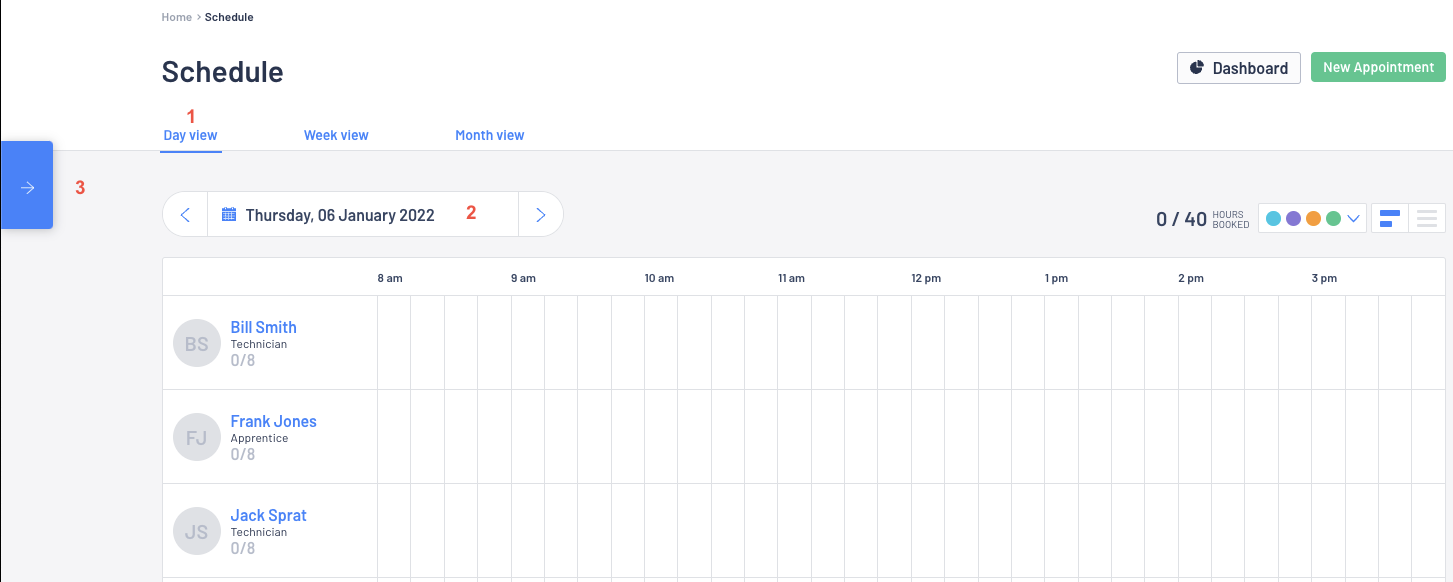
- Once you have opened the unassigned section, it will list all service jobs that have not been assigned to a technician

To assign a Service Job appointment:
- Click and hold on the appointment in the unassigned section
- then Drag and drop the appointment over to the time slot you want, under the technician you want
If you make an error, just click/hold on the Appointment again and then drag/drop again onto the new technician or time slot
Do this for all the unassigned appointments to organize your technician's day
- If a Customer Order > Service Job has not been linked to this appointment, once you have assigned an appointment to a time slot and technician, the system will automatically create a Customer Order > Service Job for you

We have also introduced icons to indicate the status of the CO > Service Job
They are abbreviated ie prog = In progress, so at a glance, your technicians can see what status the CO > Service Job is in

ditin
- There is also the ability to Assign Technician and for Technicians to Job Clock on / off directly from the Customer Order > Service Job > Technician Time section

Editing an Appointment
To edit an appointment it is as easy as clicking on the appointment either in the Scheduler itself or from the Customer Order


In both instances the Appointment window will pop up for you to change the details on:

In the Scheduler - if it is just a quick change or moves ie moving from one tech to another, you can use the drag and drop
Deleting an Appointment
If you have technicians assigned to the appointment, these will need to be removed by going into the appointment and clicking on  beside each technician that has been assigned

Then you will need to close out the relevant Service Job that the Appointment is attached to
You can do this by deleting all line items off the relevant Service Job and then actually Remove Service Job

Log Technician Away Time
We need the Scheduler to reflect away time so the dealership is not booking in appointments or assignment jobs to technicians when they are not even going to be there
For our example our technician Frank Jones will be away from the 30th November 2020 to 5th December 2020 on annual leave
The best way to do this is to Log Leave time
- From the Single Day View tab, click on Frank Jones' name
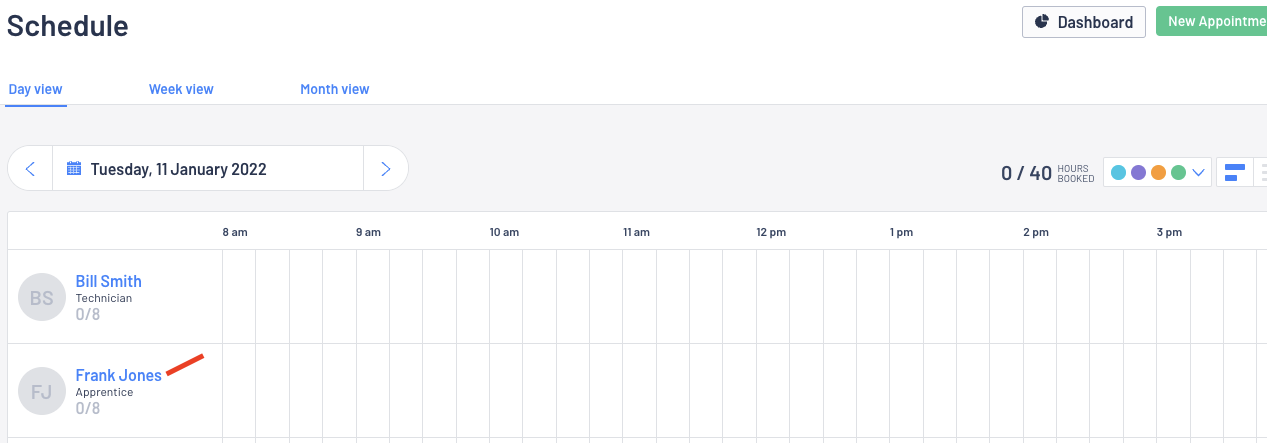
- To record his annual leave, click on
 and complete
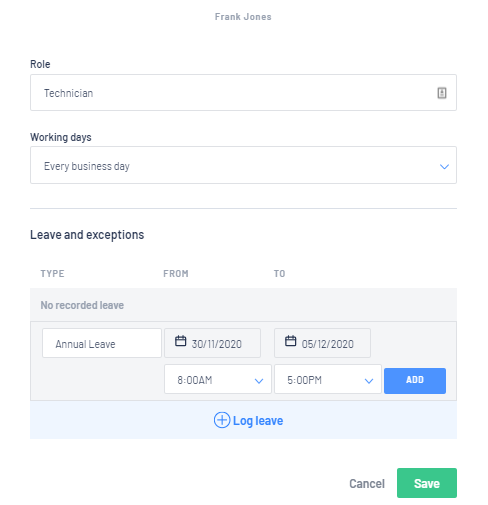 Once you are happy with the entry, click on
  to add it to the list, and then click on
- Now if you go to that date range within the Scheduler, it will indicate that Frank Jones is away and no appointments will be able to be assigned to him