This article will go through the steps involved in processing a sale made in your Ecommerce / Shopify Store in Blackpurl together with how to process a Refund of a Shopify sale
A - Prerequisites:
- Your Dealership cannot start this process until the integration fee has been discussed with Blackpurl Sales Team
Blackpurl Sales Team can be contacted by emailing - sales@blackpurl.com
Connection has been completed between your Shopify Store and Blackpurl
- Setup Configuration has been completed in Blackpurl
- Dealership has used the Website Product Management Tool to ensure that all mapping between products in their Shopify Store and Blackpurl Parts Records have been completed / managed
Please review this article for further information on the above - Blackpurl / Website Product Management / Ecommerce Store (ie Shopify)
B - What happens now?
Scenario - a customer purchases a product from your Shopify Store and it needs to be processed in Blackpurl (maybe the part needs to be ordered from the Vendor / maybe you have stock on hand)
With full integration, all sales from your Shopify Store will automatically come through Blackpurl and create a Customer Order with a Parts & Accessories section
C - Products in your Shopify Store that are linked to existing parts in Blackpurl
- For those Shopify products that already linked to existing Part Records in Blackpurl, they will be added to the Customer Order as a line item and will inform the status of the part ie IN STOCK
D - Products in your Shopify Store that are not linked to existing parts in Blackpurl
- For those Shopify products that are not linked to an existing Part Record in Blackpurl, they will still integrate to Blackpurl onto a Customer Order BUT they will added as a FEE
Blackpurl will use the FEE that the Dealership has indicated to use (as per Step 1 and 2 in this article - Setup Configuration - Blackpurl / Ecommerce Store)
It will be up to the Dealership to change this FEE to a "real" Blackpurl Part Record for inventory purposes

Details about the Shopify part that has been added to the Customer Order as a FEE will also be referenced in the internal notes

- Payments received in the Shopify Store will also show in the Deposit section on the relevant Customer Order
Blackpurl will use the Payment Method that the Dealership has indicated to use in System Settings - as per Step 1 and 2 in this article - Setup Configuration - Blackpurl / Ecommerce Store)

F - Finalising your Blackpurl Customer Order
- You will need to finalise your Blackpurl Customer Order as per normal ie if the part needs to be ordered, then you will need to complete the VO / VR process
- Once all the items in Blackpurl have been satisfied you will need to check out as per normal ie if there is deposit $$ that have come over from the Shopify Store, then you will checkout using those deposit funds
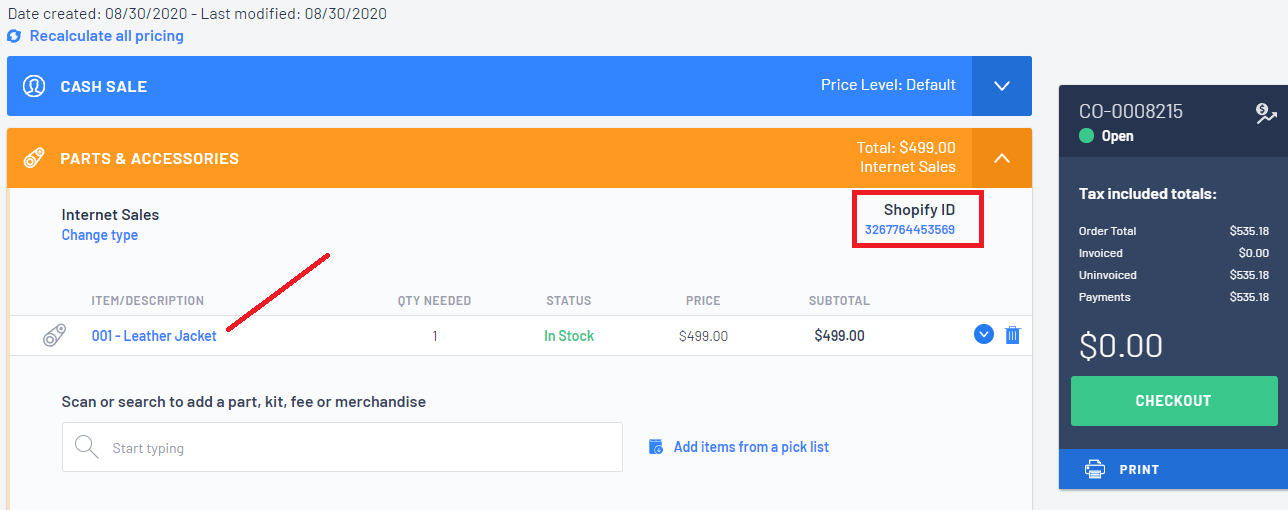
G - Finalising your Shopify Store Transaction
- Once you have finalise the Blackpurl side of the transaction, will need to finalise it in your Shopify Store
- Simply click on the Shopify Store ID number that is referenced on your Customer Order and it will take you directly to that transaction in your Shopify Store

I - Reporting: How to find the relevant Customer Orders created in Blackpurl automatically for your Shopify Store
In your initial setup it was suggested that you create a new Transaction Type specifically for your Shopify Store sales - as per Step 1 and 2 of this article - Setup Configuration - Blackpurl / Ecommerce Store
This Transaction type was then added to your System Settings so that each time a Shopify sale integrated to Blackpurl that it would automatically have that Transaction Type
We are now going to use this Transaction Type to report in Blackpurl on your Shopify Store sales:
- Navigate to Reporting > Reports > Active Part Sales

- Now change the parameters to only show you the relevant Customer Orders for the specific Transaction Type:

1. Click on 
2. Click on 
3. Click on Sales Type to add that field to the parameters

4. Click into the Sales Type field and then select the Transaction Type of your Shopify Store sales
Don't forget to then click on 
- The search result will then list all Customer Orders for that Transaction Type

Change any of the date filters / Add and/or remove any columns and then when you are happy with the Report, use the  and save the report so you use it next time
This article will assist with reporting - Reporting Tips - Totals / Changing Columns / Changing Parameters / Exporting Search Results
Was this article helpful?
That’s Great!
Thank you for your feedback
Sorry! We couldn't be helpful
Thank you for your feedback
Feedback sent
We appreciate your effort and will try to fix the article
