This article will cover how to create / add a new Kit and how to hide the Kit line items on Customer facing documents
For information about what a Kit is, please review our article - (Classic Version) What is a Kit?
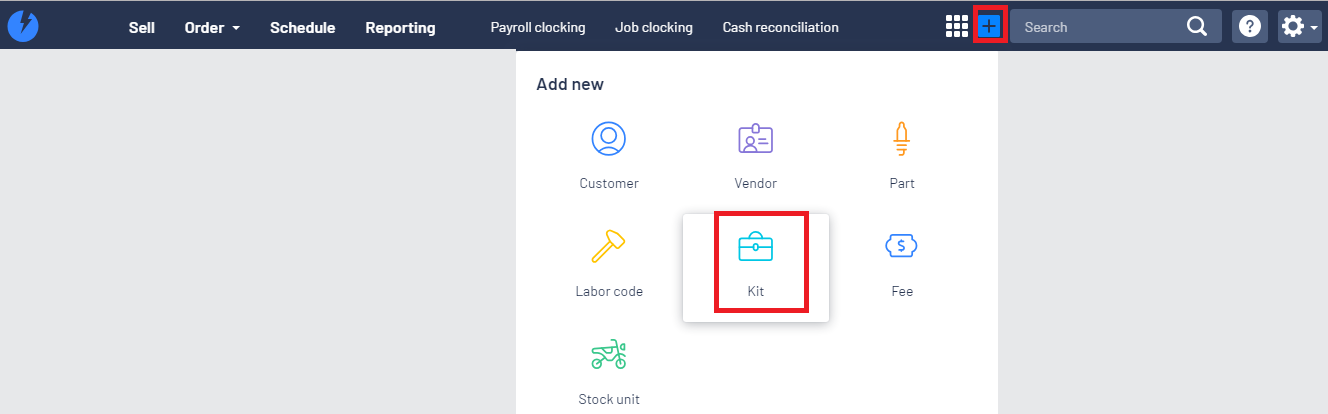
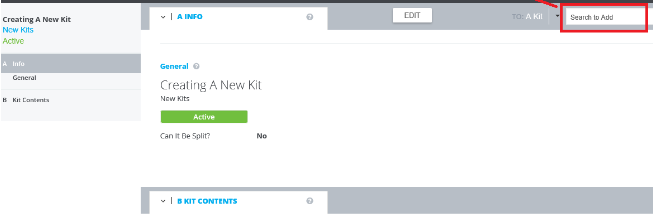
How to create / add a new Kit
- From the Blackpurl Header > Click
 >
> 
- Complete the relevant details on the New Kit window and then click

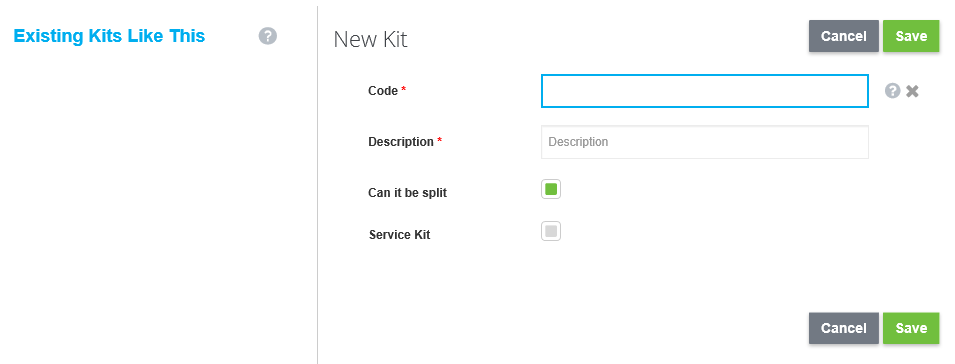
Description: Type in the description of this Kit
Can it be Split: Indicates when you have added this Kit to a Customer Order, whether or not the user split
Service Kit: Indicates whether or not this Kit can be used on a Service Job
If Service Kit is selected, there will be additional information that you will need to complete ie Concern / Cause / Correction, What Transaction Types can use this Kit etc
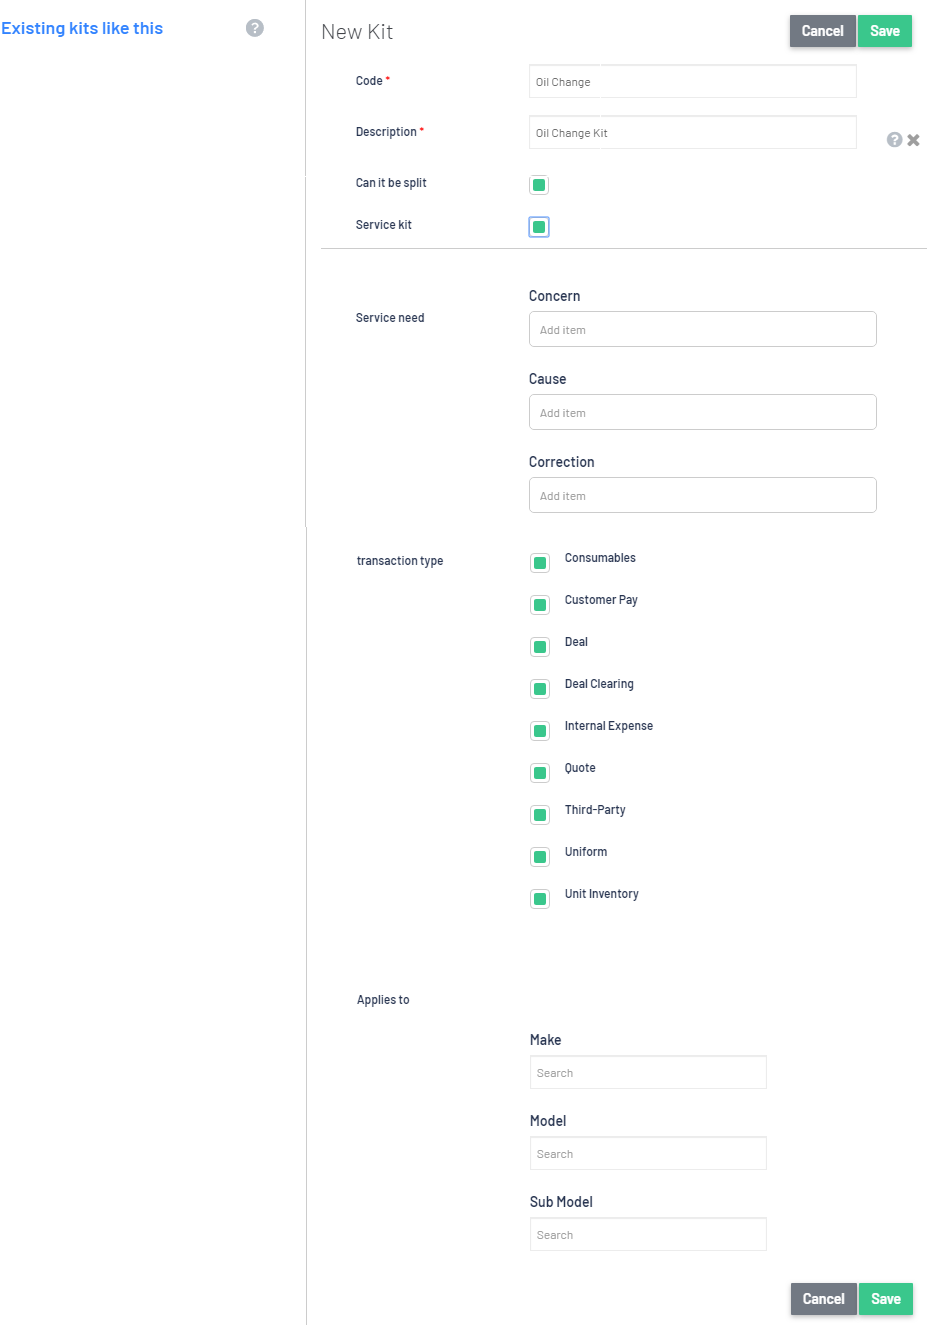
Tip:
When entering text in the Concern / Cause / Correction sections - you will need to press Enter on your keyboard to accept the text

Any text entered into Concern / Cause / Correction will be able to be edited once on a Customer Order
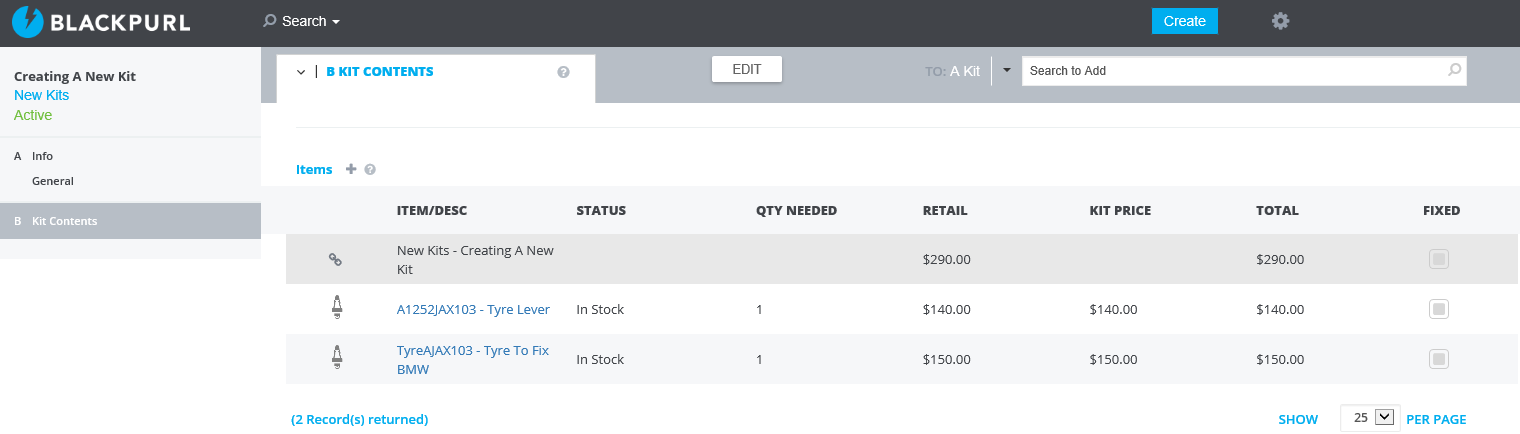
- Once you have saved the Kit, the system will open up the Kit record, for you to add items to this Kit
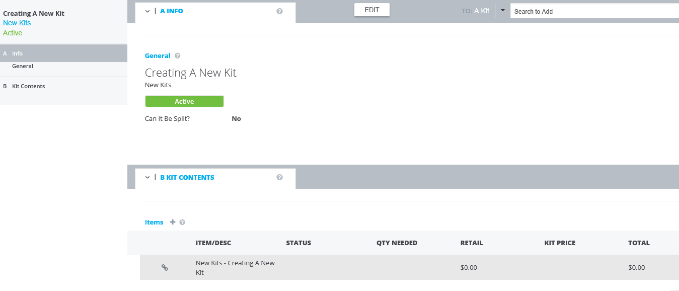
- Once you have added the item to the Kit, it will list in the Kit Content area for review of the Qty and Price
Tip:
Fees and Parts can be added as a negative value to Kits- Once the Kit contents is complete - review the pricing / quantity / indicate if the line items are fixed (if they are fixed, the price cannot be changed etc)
Result - When this Kit is added to a Customer Order, all items listed in the Kit Content will automatically populate onto the Customer Order
Tip: Once the Kit has been added to a Customer Order, the user will have the option of Breaking up the Kit if required Simply click onand it will no longer be a Kit but individual line items and once individual items, you can delete items

How to hide the Kit line items on Customer facing documents
There are two options on how Kits can show on Customer facing documents in Blackpurl
Option 1 - show all Kit line items (this is the default)
The Kit will show on all documentation in a Customer Order as you have created it
The Kit description and then a listing of all line items with prices - see example below of a Invoice Preview:

Option 2 - Hide all Kit line items
The Dealership can elect to have the Kit show up on Customer facing documents as just the description line with total
The Kit will show all items on the Customer Order sections

But when you print / email customer facing documents, the Kit will only show up as the description line with total
This is an example of the above Kit and how it will show up on a Invoice Preview as the description line only with total

If enable this option - navigate to System Settings > Settings and Controls - Shop settings and then move the toggle for the setting Hide kit details on documents

These are the Customer facing documents that will now only show the Kit description and total:
Customer Approvals
Deal documents
Deposit Receipt
Invoice Preview
Checkout Invoice
This change will NOT apply to the following documents:
Third party claim documents
Parts Picklist
Third-party and Internal invoices
Service Worksheet
Service Job Review
Was this article helpful?
That’s Great!
Thank you for your feedback
Sorry! We couldn't be helpful
Thank you for your feedback
Feedback sent
We appreciate your effort and will try to fix the article