This article will take you through what User Permission are and how to set them up in Blackpurl
If you need to know what are the current Blackpurl User Permission are and what they do, this is the relevant link - Current User Permissions
What are User Permissions
User Permissions allows the Dealership to allocate access or restrict access to certain sections of Blackpurl for particular groups of Users
For example you may not want your Unit Sales search to have access to System Settings or to see costings so you would set them up to only have User Permission for certain sections of Blackpurl
How to setup User Permissions
The scenario would be - in the Dealership, the Unit Sales staff do not need access to Account Settings but they need access to Customer Order Units. Your process would be:
- Create new Group for User Permission Group - Unit Sales in Blackpurl
- Assign the relevant permissions to suit what this group would and would not have permission to access
- Assign the relevant Users to this group
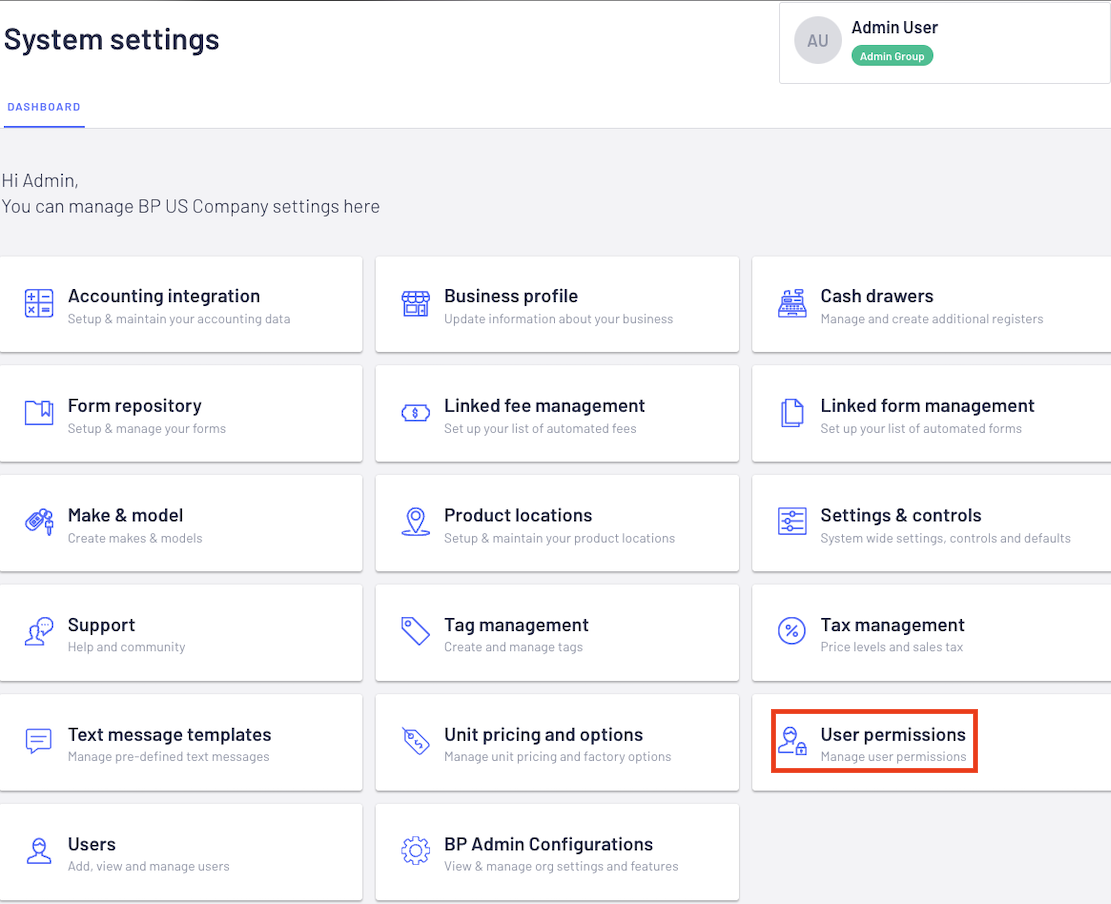
- From the Blackpurl Header > click on
 > System settings

- From the System Settings Dashboard > click on

- The User Permission screen will load - let's do a quick navigation:
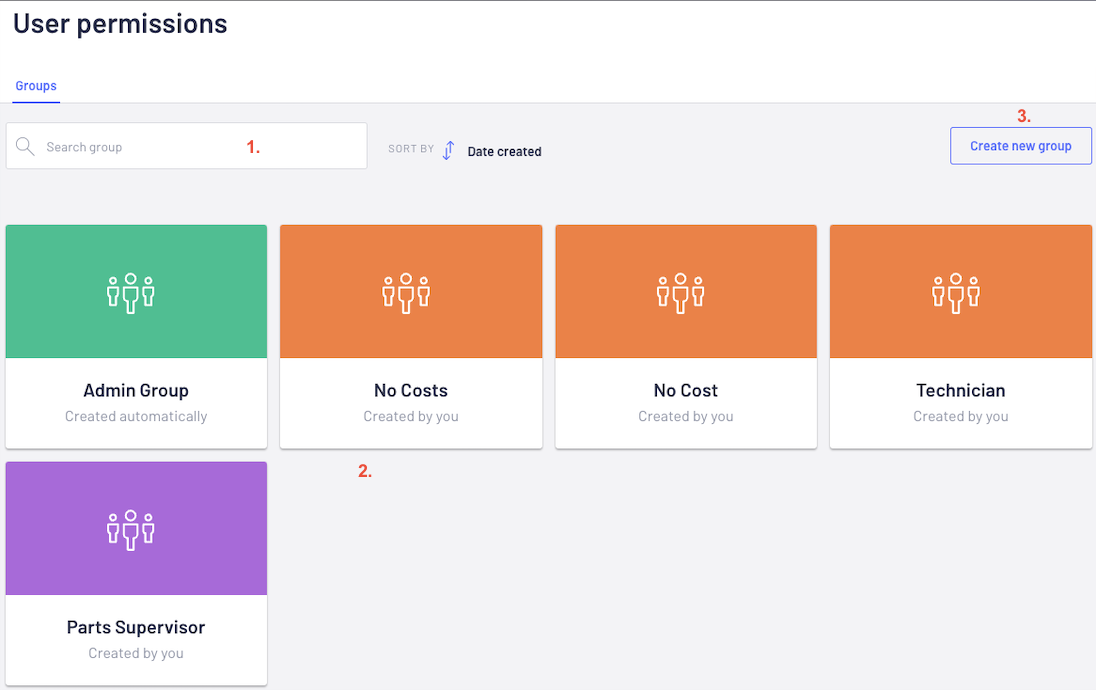
2. A list of the current User Permission Groups currently in Blackpurl
3. To create a new User Permission Group - click on
Tip:
If permission changes are required for a particular User Permission Group, click on the relevant User Permission Group icon and it will take you to the permission settings for amendments
- For this example, we are going to create a new User Permission Group - Unit Sales, work through the list of permissions and then decide which users need to be assigned to this group
 for the Create a New Group window to pop up
On the Create New Group window - type in the New Group's Name and Assign a colour than click on


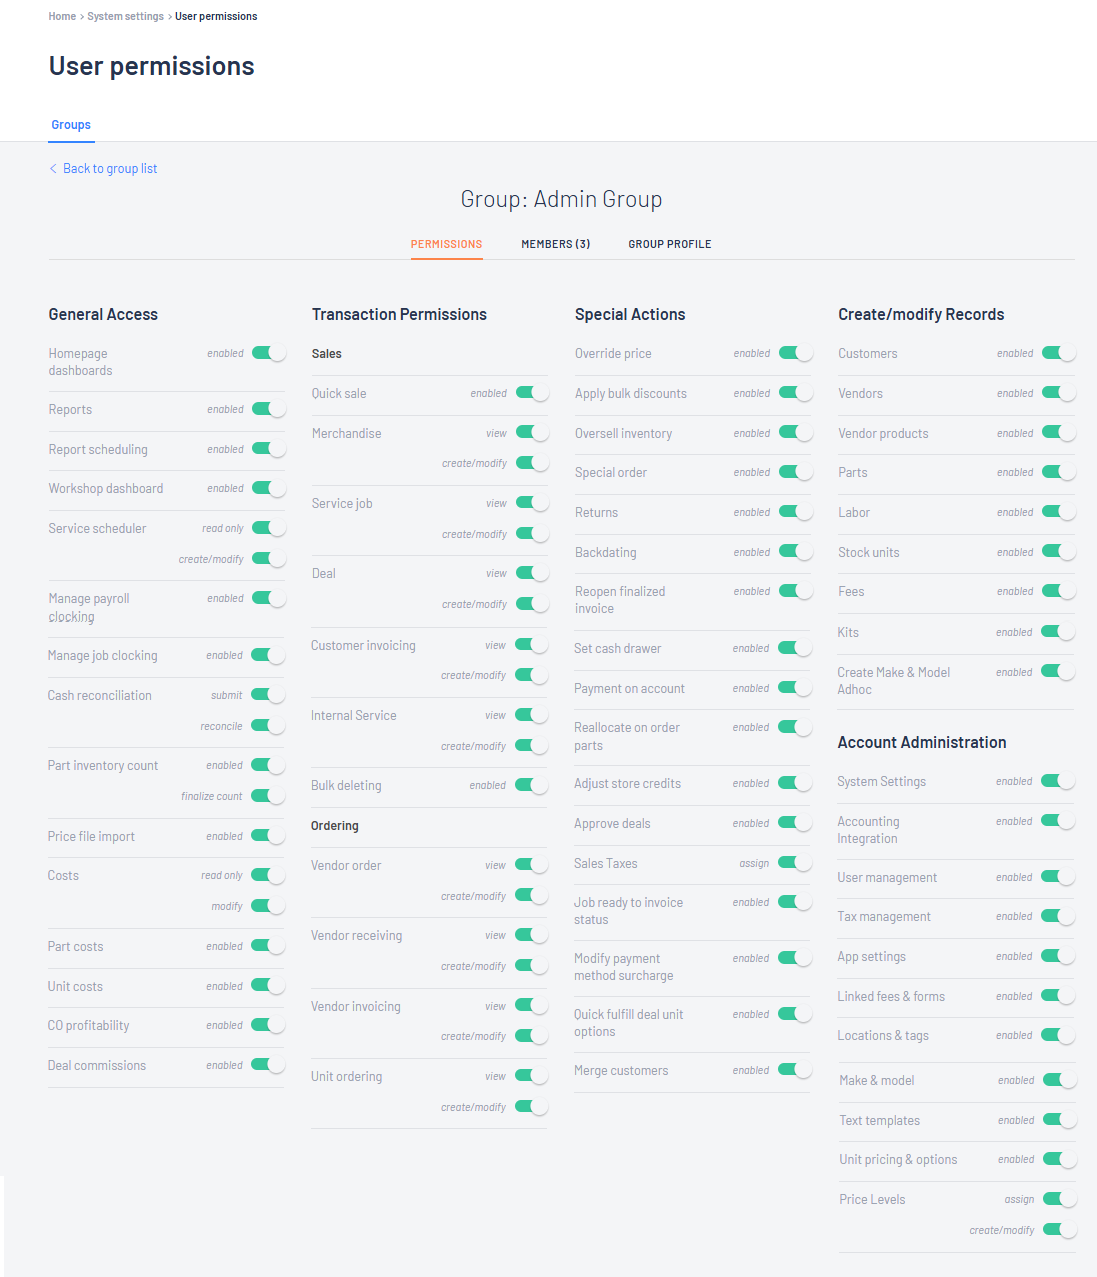
- Take your time and work through the list of permissions, deciding what this User Permission Group should have permission to access
This is a link to an article that will tell you what each User Permission is for - Current User Permissions
 to
to  .
.In some instances, if the permission is enabled, new options may appear for you to make further decisions ie if the User Permission Group can have the access to Create / Modify as well

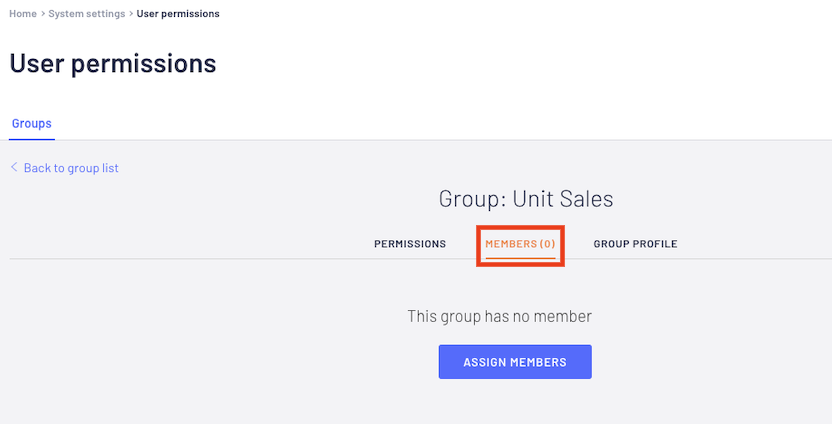
- Now it is time to allocate users to this User Permission Group > click on Members Tab
 and the Assign Users to Unit Sales window will pop up
Click into the Search Users field and the list of current users will come up
Search through and click to select on the users that need to be assigned to this group

Then click on 
- Blackpurl will update the Members Group with the User name that was just assigned to this User Group
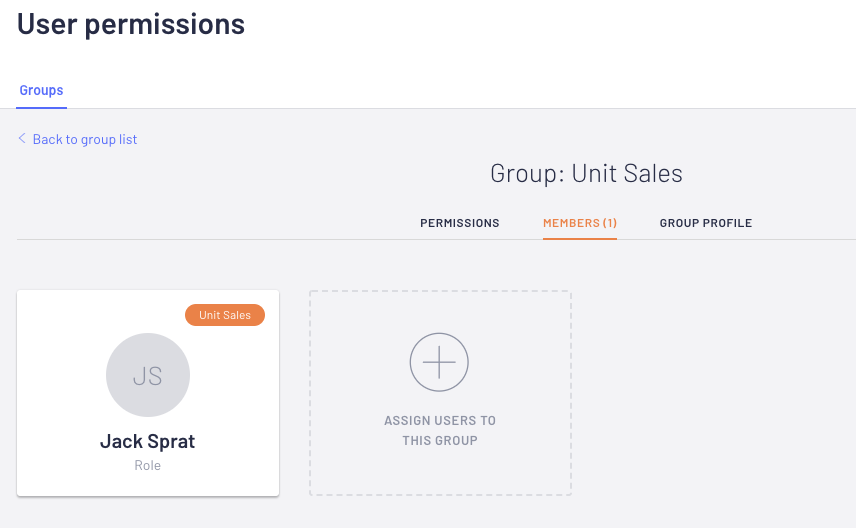
Please note that Users can only be assigned to one User Permission Group
Was this article helpful?
That’s Great!
Thank you for your feedback
Sorry! We couldn't be helpful
Thank you for your feedback
Feedback sent
We appreciate your effort and will try to fix the article