This article will go through:
- What are Account Types
- What is the purpose and benefits of Account Types
- How to review and setup up new Account Types as required
- Assigning Account Types to Vendors and Customer Records
- Grid Search / Reporting on Account Types
What are Account Types
Account Types are assigned to both Vendor and Customer Records to let Blackpurl know what the default is and if there are any tax exemptions involved
When Dealerships first start with Blackpurl, these are the defaults that are on your Blackpurl

This means that when a user creates a new Customer Record, they will automatically be given the default Account Type of Retail Customer and will have no tax exemptions
Example is John Doe

What is the purpose and benefits of Account Types
The Dealership will be able to:
- have different Account Types set up based on different tax exemptions. Remember that tax exemptions are controlled by Account Types
Customer:
This means that Customer: Cathy Price may be exempt from Tax: GST so the Dealership can set up a new Account Type, have it exempt from the Tax: GST and assign that Account Type to the Customer Record for Cathy Price
When the Dealership then processes a Customer Order for that Customer, it will know what tax must or must not be charged
Vendor:
This means that the Dealership may not get charged any Vendor tax by the Vendor: Industries Company so the Dealership can set up a new Account Type, have it exempt from all Purchase Taxes, and then assign that Account Type to the Vendor Record for Industries Company
When the Dealership then processes a Vendor Invoice for that Vendor, it will know what tax must or must not be taken into account
- report to be run for these entities that can be filtered and/or sorted by this Account Type
How to review and set up a new Account Types as required
Where to find the list of Account Types in your Blackpurl
From the Blackpurl Header > click
 and then select

- Go to the Settings - Account types / tax exemption section

- Using the above screenshot, you can see that this dealership only has two Account Types / Tax exemptions set up:
Account Type
Retail Customer - applies to Customers only and it has no tax exemptions / it is the Default / it is Active
This means that each time a Customer with this Account Type purchases items from your dealership, they will be charged the applicable sales tax
Each time you set up a new Customer, it will take this Account Type as the default
Account Type
Supplier - applies to Vendors only and it has no tax exemptions
This means that each time the dealership purchases from Vendors with this Account Type, the applicable purchase tax will be charged
Tip: If you wish to edit the Account Type, click onon the relevant Account Type line
Adding new Account Types
You can have as many Account Types as you require - with different combinations of tax exemptions etc
Use the same concept for creating a new Account Type that applies to Vendors and Customers the only difference is that you would indicate if it applies to Customers or Vendors
Simply click on  and then complete the Add account type pop-up
Don't forget to 

Let's go through an example:
We have Customers that are GST exempted so we need to create a new Account type
Account type name - give it a name that means something
Applies to - Customers only and then tick all Exempt checkboxes - see below:

The new Account Type will then appear in the list with the other Account Types

Tip:
Note that we have not updated the default

This means that all new Customers / Vendor created will still have the default Account Type

Should you wish a Customer Record / Vendor Record to have a different Account Type, read the next section - Assigning Account Types
Assigning Account Types
When creating new Vendor / Customer Records, they will automatically take the default Account Type

Use this same concept for assigning Account Types to both Vendors and Customers - the user would need to navigate to the relevant Vendor Record or Customer Record that you want to assign a new Account Type to
Example using Customer Record
- Navigate to the relevant Customer Record and click on


From the Edit Customer Screen > find Account Type field and select your new Account Type > 
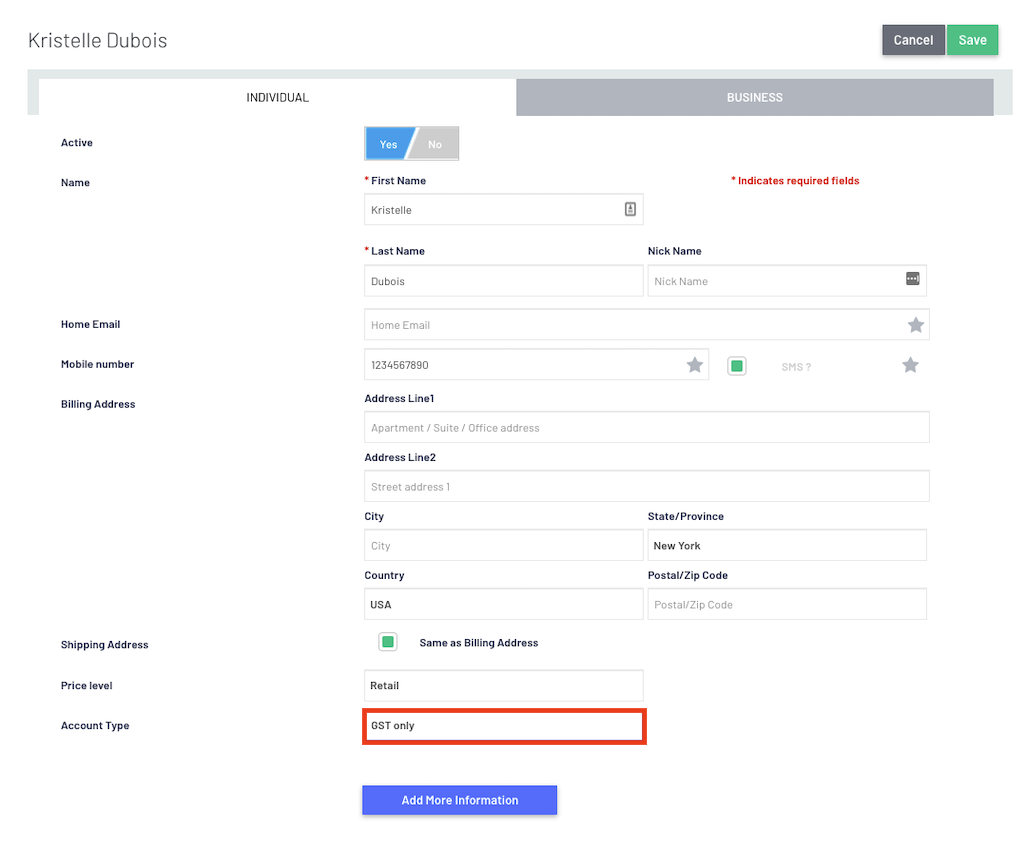
The Customer Record will update with the new Account Type and what the relevant tax exemptions are:
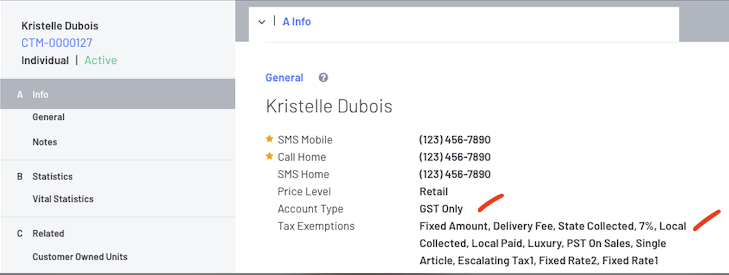
Tip:

If you have a Customer Order in play then you will need to use the Recalculate functionality to pick up the change to the Customer Record

See Item 10 on this article - Types of Customer Orders / Basic Navigation of Customer Order Screen
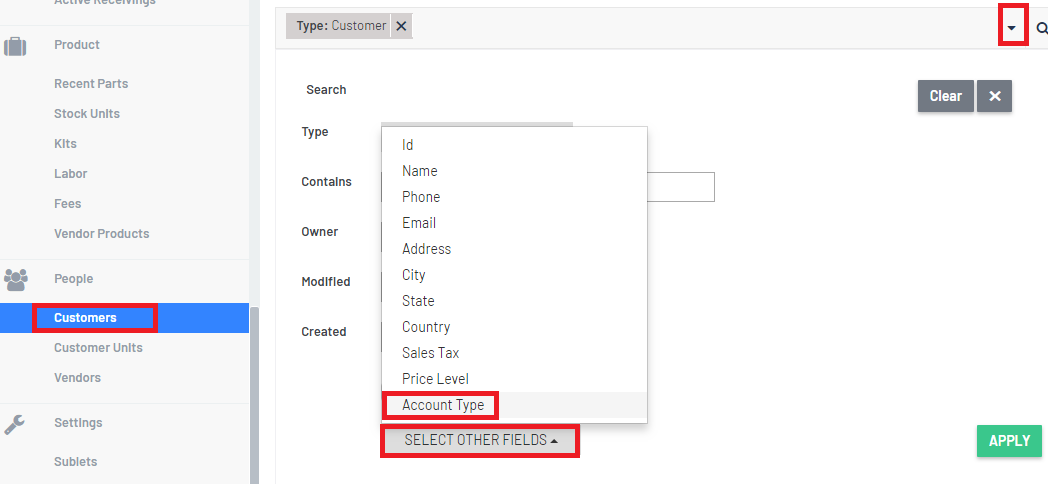
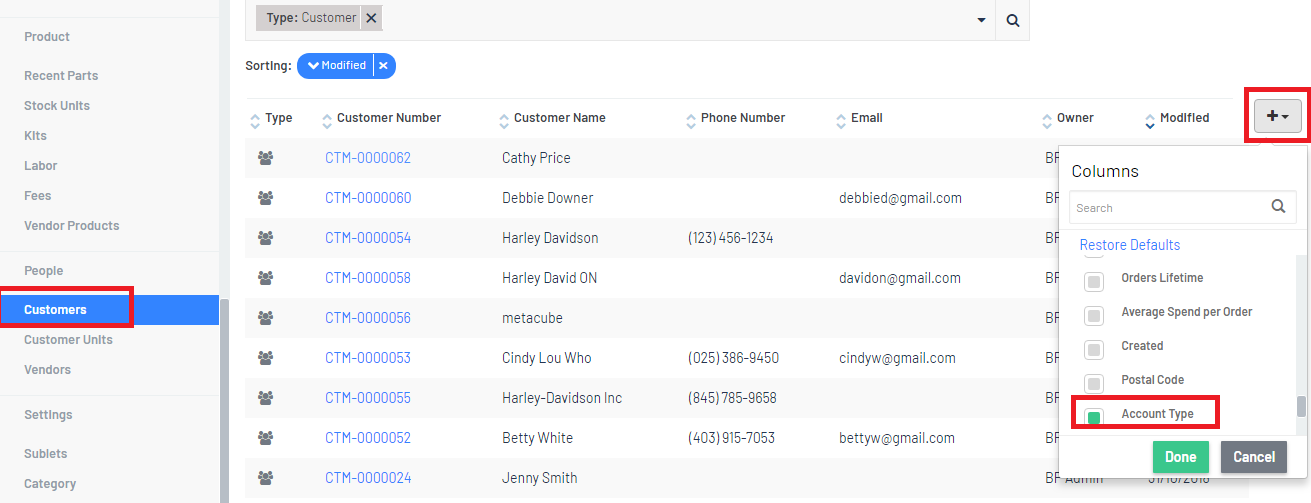
You can now run certain grid searches and have the option of adding a new column Account Type
For example
- If you run a Customer search, you can now select a new column to report on Account Types:
- You now have the option in the parameters to report on Account Types